Tag: Rice Recipes

  • Rice Kheer Recipe – Creamy Pakistani Rice Pudding

    Rice Kheer Recipe – Creamy Pakistani Rice Pudding

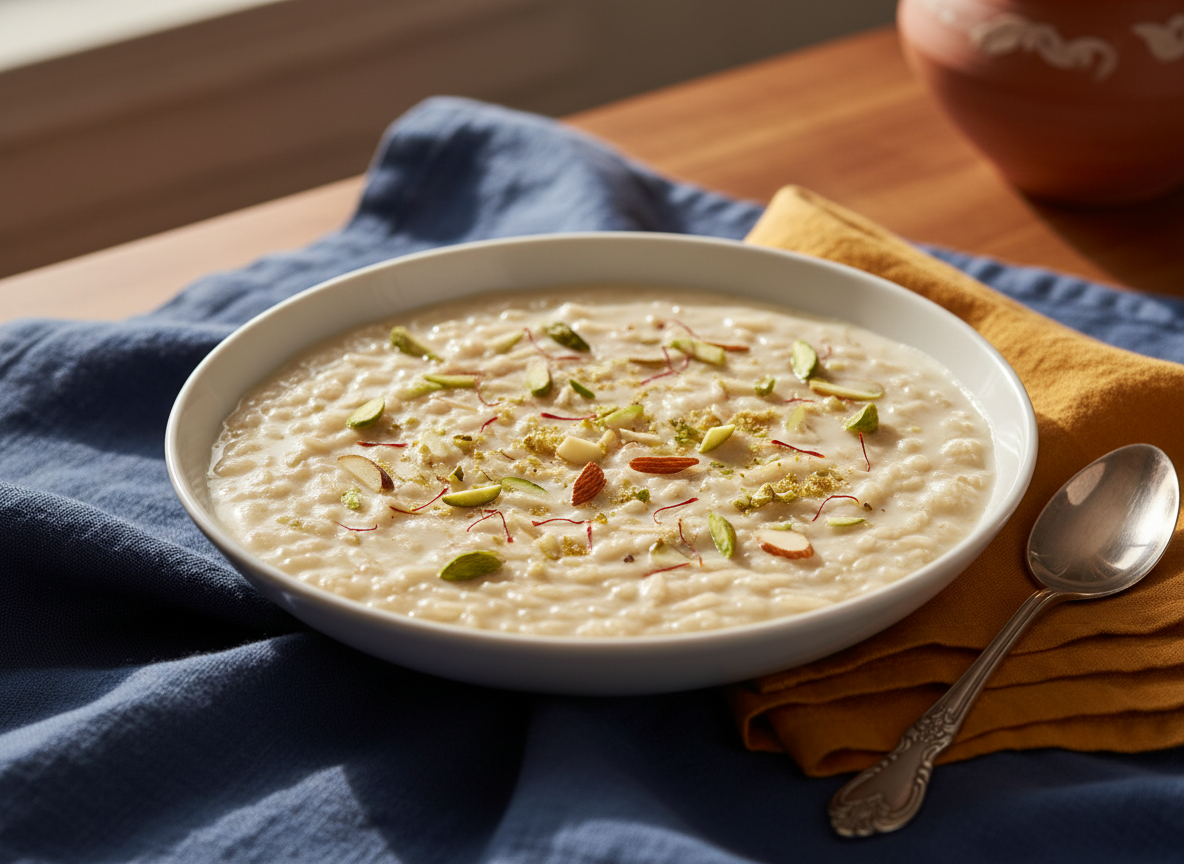
    Rice Kheer Recipe is a gently simmered milk pudding. Stir regularly so the milk does not catch at the bottom of the pan.

    Ingredients

    • ¼ cup basmati rice, rinsed and soaked
    • 1 litre milk
    • ⅓–½ cup sugar, to taste
    • 3 green cardamom pods, lightly crushed
    • Chopped almonds and pistachios
    • A few strands of saffron (optional)

    Method

    1. Bring milk to a gentle simmer in a heavy pan.
    2. Add drained rice and cardamom. Cook on low heat, stirring frequently.
    3. When the rice is soft and the milk has thickened, add sugar.
    4. Simmer for a few more minutes, then remove from heat.
    5. Garnish with nuts and saffron. Serve warm or chilled.

    Rice Kheer at a glance

    Preparation5 minutes
    Cooking50 minutes
    Total time55 minutes
    Servings6
    DifficultyEasy

    Times are estimates and may vary with your equipment and experience. Adjust seasoning to taste and follow safe food-handling practices.

    Frequently asked questions

    Why does kheer thicken as it cools?

    Rice starch continues to thicken the milk pudding as it cools.

    Can I serve rice kheer chilled?

    Yes. Cool it safely and refrigerate before serving.

    How do I stop milk sticking?

    Use a heavy pan and stir regularly over low heat.

    Extra cooking guidance and practical tips

    Choose a heavy-bottomed pot to reduce the chance of milk catching on the base. A wide pan allows moisture to evaporate, but a deeper pot can reduce splashing. Whichever you use, keep the heat gentle and stir often, especially around the bottom edge.

    Rinsing and soaking the rice helps remove excess surface starch and encourages more even cooking. Drain it before adding to the milk. Some cooks lightly crush a portion of the soaked rice to thicken the pudding more quickly; this is optional and changes the final texture.

    Do not add all the sugar at the beginning. Sweetened milk can take longer to reduce, and sugar may catch on the bottom if the pan is not stirred carefully. Add it once the rice is tender and the milk has begun to thicken, then simmer briefly to combine.

    Cardamom gives kheer its familiar fragrance. Crush the pods lightly so the flavour can infuse, and remove whole pods before serving if desired. Saffron is optional; if using it, steep a few strands in warm milk before adding.

    Kheer thickens as it cools because the rice continues to absorb liquid. Keep this in mind when deciding when to stop cooking. If it already looks very thick in the hot pan, it may become too firm after chilling. Leave it slightly looser than your preferred final texture.

    Serve kheer in small bowls, warm or chilled. Garnish with chopped almonds and pistachios just before serving. If you are serving people with nut allergies, leave the nuts off and use a little cardamom instead.

    More helpful tips for home cooks

    Use full-fat milk for a creamy result, or lower-fat milk if you prefer a lighter pudding. Lower-fat milk may take a little longer to develop the same rich mouthfeel. Avoid using flavoured or sweetened milk because it changes the balance of the recipe.

    Keep the milk at a gentle simmer rather than a rolling boil. A vigorous boil can cause it to foam over and may make the rice break apart. Stir in a slow figure-eight motion, scraping the bottom and sides so the rice does not settle and stick.

    The amount of sugar is flexible. Start with the lower quantity, allow it to dissolve, then taste carefully. Remember that chilled desserts can taste slightly less sweet than warm ones, so consider how you plan to serve the kheer before making a final adjustment.

    If the kheer becomes thicker than you like, stir in a little warm milk until it reaches the desired consistency. Add a small amount at a time. If it is too thin, continue simmering gently, stirring frequently, until some moisture evaporates.

    To serve chilled kheer, transfer it to shallow bowls or a covered container and refrigerate promptly. Do not leave the pot on the counter for hours to cool. Shallow portions cool more quickly and can be covered once the steam has subsided.

    For a subtle variation, add a few strands of saffron or a small splash of rose water near the end. These flavours can be strong, so use them sparingly. The classic combination of milk, rice and cardamom is delicious on its own.

    Final preparation notes

    If you want a thicker, more traditional pudding, continue reducing the milk slowly after the rice softens. Do not increase the flame to hurry the process. Gentle simmering gives the rice time to release starch and blend into the milk without scorching the base.

    For individual servings, portion the kheer into small cups while it is still pourable. Let it cool briefly, then refrigerate. Garnish each cup with nuts or cardamom just before serving. This makes the dessert easy to serve at family meals or gatherings.

    A clean spoon should be used each time you serve from a shared container. Do not return a spoon that has touched someone’s bowl to the storage container. Small handling habits help keep leftovers safe and fresh.

    If the rice grains remain firm while the milk is already thick, add a little warm milk and continue cooking over low heat. Stir often until the rice softens. This is better than turning the heat high, which can burn the milk.

    Avoid adding acidic ingredients such as lemon to milk kheer, as they can cause the milk to split. Keep the flavour profile simple with cardamom, saffron or a little rose water if desired.

    Helpful details for consistent results

    The pudding can be adapted for different textures. For a looser dessert, stop reducing the milk earlier and serve warm. For a thicker chilled kheer, simmer a little longer, remembering that it will firm up in the refrigerator. Keep notes of the rice brand and cooking time if you want to repeat a preferred result.

    If you are serving kheer after a spicy meal, a small chilled portion can be a gentle finish. Keep it refrigerated until serving and do not leave the bowls sitting out for an extended period. Return any untouched portions to the refrigerator promptly.

    Use a clean, dry measuring cup for rice and sugar. Measuring the rice consistently helps keep the pudding balanced. Too much rice can make the kheer dense, while too little may leave it thin unless it is reduced for a long time.

    When stirring, scrape the bottom with a wooden spoon or heat-safe spatula. A whisk can break up small clumps, but avoid vigorous whisking once the rice is soft because the grains can become mashed. A gentle stir keeps the texture appealing.

    Kheer is a forgiving recipe once you understand the reduction stage. If the first batch is thicker than you wanted, adjust the milk slightly next time. If it is thin, allow more time for simmering. Small changes are more useful than changing several ingredients at once.moreChana Chaat Recipe – Easy Pakistani Chickpea Snack

    More serving and preparation advice

    A traditional kheer is not meant to be rushed. Gentle cooking gives the rice time to soften and release starch into the milk. If you keep the flame low and stir consistently, you can develop a creamy texture without needing thickening agents.

    If you use a different rice variety, the cooking time may change. Some short-grain rice softens faster and releases more starch, while long-grain basmati may remain more distinct. Check the grains as they cook and adjust the simmering time rather than following the clock exactly.

    For a dairy-free experiment, use an unsweetened plant-based drink that is suitable for simmering, but expect a different flavour and consistency. The classic recipe relies on dairy milk, so substitutions should be treated as a variation rather than an identical result.

    Do not store kheer in a large warm pot for a long time. Divide it into smaller containers so it cools more quickly, then refrigerate. This is especially important in warm weather. Keep the refrigerator cold and avoid leaving individual bowls out after serving.

    Extra notes for serving at home

    A small amount of crushed pistachio or almond on top gives a gentle crunch, but the garnish is optional. If you prefer a completely smooth bowl, leave nuts out and add only a pinch of cardamom. The dessert should still taste rich from the slow-simmered milk and softened rice.

    When you make kheer regularly, note whether you prefer it warm or chilled and adjust the final reduction accordingly. Warm kheer can be served a little looser, while a chilled bowl needs enough body to remain creamy after refrigeration. A small adjustment in simmering time can make a noticeable difference.

    The recipe is also useful for using a small amount of leftover plain rice, although the texture will differ from cooking raw rice in milk. If using cooked rice, add it only after bringing the milk to a simmer and reduce the cooking time. Check that the rice is fresh and has been stored safely.

    For the best flavour, use plain milk and fresh cardamom rather than a strongly flavoured packaged dessert mix. The slow-cooked rice and milk create the pudding’s character, while the garnish should remain a small finishing touch.
  • Chicken Biryani Recipe – Fragrant Pakistani Chicken Rice

    Chicken Biryani Recipe – Fragrant Pakistani Chicken Rice

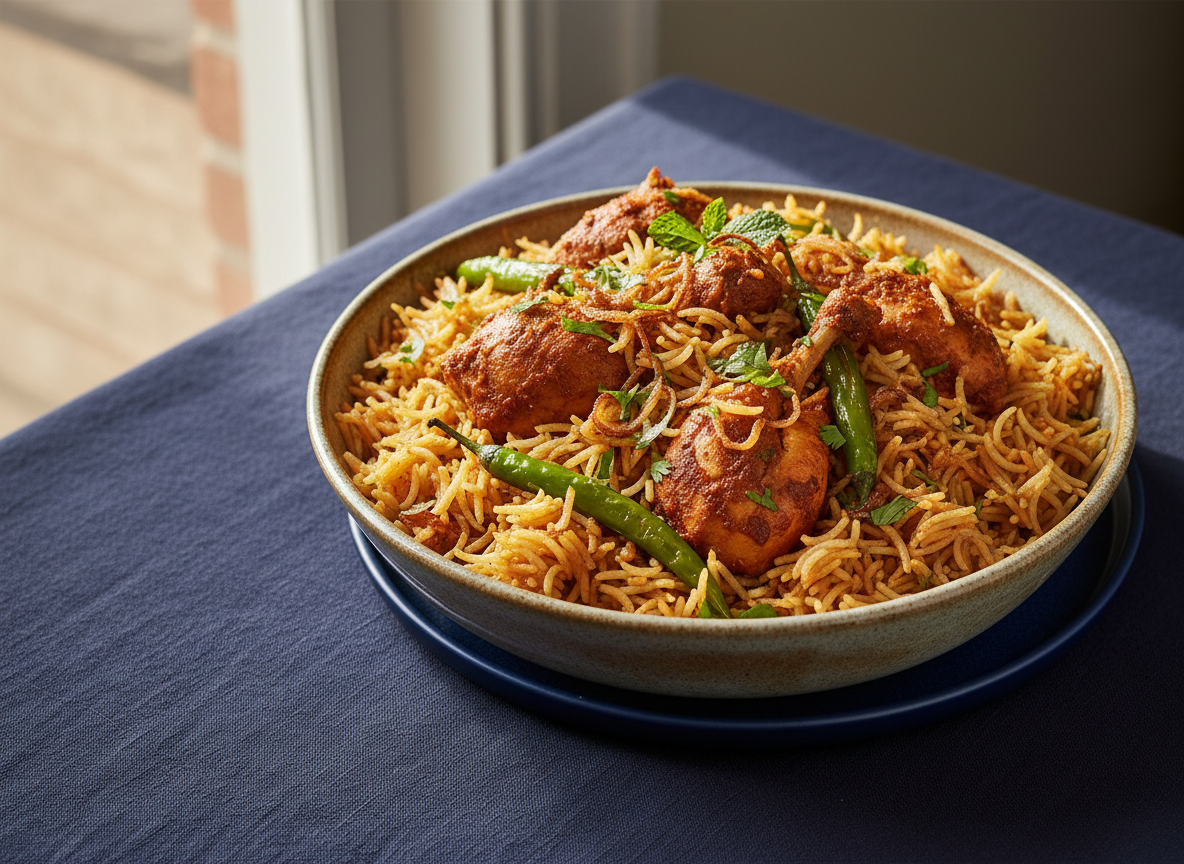
    A home-style Chicken Biryani Recipe with a spiced masala, partly cooked rice and a final gentle steam. Prepare the components before layering.

    Ingredients

    • 750 g chicken pieces
    • 2 cups basmati rice, rinsed and soaked 20 minutes
    • 2 onions, thinly sliced
    • 2 tomatoes, chopped
    • ½ cup plain yogurt
    • 2 tbsp ginger-garlic paste
    • Biryani masala or a mix of cumin, coriander, chilli and garam masala
    • Mint, coriander, green chillies and lemon
    • Oil or ghee, salt and a pinch of food colour (optional)

    Method

    1. Fry onions until golden. Remove some for garnish.
    2. Add chicken, ginger-garlic paste and spices; cook until fragrant.
    3. Add tomatoes and yogurt. Simmer until chicken is cooked and masala is thick.
    4. Boil rice in salted water until about 70–80% cooked; drain.
    5. Layer rice over chicken masala. Add herbs, fried onion and lemon.
    6. Cover tightly and steam on very low heat until rice is tender and flavours combine.
    7. Rest briefly, then fluff gently and serve.

    Cooking time varies by rice and pot. Ensure chicken is fully cooked before serving.

    Chicken Biryani at a glance

    Preparation25 minutes
    Cooking65 minutes
    Total time90 minutes
    Servings6
    DifficultyMedium

    Times are estimates and may vary with your equipment and experience. Adjust seasoning to taste and follow safe food-handling practices.

    Frequently asked questions

    Why should rice be partly cooked first?

    It finishes steaming with the chicken masala so the grains do not overcook.

    Can I make biryani less spicy?

    Reduce green chillies and chilli powder to suit your taste.

    How should I store leftovers?

    Cool promptly, refrigerate in a covered container and reheat thoroughly.

    Understanding the rice and masala

    Basmati rice is valued for its long grains and aroma. Rinse it several times until the water is less cloudy, then soak it for around 20 minutes. This helps the grains cook more evenly. Do not soak for an unusually long time unless the rice package recommends it, because very soft grains can break during boiling and layering.

    The chicken masala should be flavourful and slightly moist, not watery. The rice will take on aroma from the masala during the final steam. If the masala is too thin, the lower rice layer can become soggy; if it is too dry, the flavours may not spread evenly. Reduce excess liquid before layering.

    Layering and steaming tips

    Spread the chicken masala evenly across the bottom of a heavy pot, then add the drained parboiled rice in a loose layer. Sprinkle herbs, fried onion and lemon over the rice. If using food colour, dissolve a tiny amount according to its package directions and drizzle sparingly; it is optional and does not create the flavour of biryani.

    Seal the pot with a tight-fitting lid. If the lid is loose, place a clean kitchen towel between the pot and lid, keeping it safely away from the flame. Steam on very low heat. A heat diffuser or tawa beneath the pot can help prevent the bottom layer from scorching.

    Choosing and balancing spices

    Biryani masala blends differ in strength, salt and chilli level. If using a packaged blend, check its label before adding extra salt or chilli. Whole spices such as cardamom, cinnamon, cloves and bay leaf can add aroma, but use them in moderation so they do not overpower the chicken.

    Yogurt adds body and a gentle tang to the masala. Use plain unsweetened yogurt and stir it in over moderate heat. If it is very cold, allow it to lose some chill before adding. Stir continuously at first so it blends smoothly.

    Troubleshooting biryani

    If the rice is still firm after steaming, sprinkle a little hot water over it, cover tightly and continue on very low heat for a few minutes. Avoid stirring repeatedly because that can break the grains.

    If the rice becomes mushy, it may have been boiled too far before layering or steamed with too much liquid. Next time drain the rice when it is still slightly firm in the centre and make sure the chicken masala is not watery.

    If the bottom catches, lower the heat and use a heavy pot or heat diffuser. Do not scrape burnt rice into the rest of the dish; carefully transfer the unburnt biryani to a serving dish.

    Serving and planning ahead

    Serve biryani with plain raita, sliced cucumber, onion and tomato salad or a simple mint chutney. Since the rice and chicken are richly seasoned, fresh and cooling sides are usually enough. Lemon wedges can be offered separately.

    You can prepare the chicken masala earlier and refrigerate it promptly, then cook the rice and assemble the biryani closer to mealtime. Keep the cooked masala chilled and reheat it until hot before layering. Do not leave cooked chicken at room temperature while preparing the rice.
    for more infoTawa Seekh Kebab Recipe – Easy Stovetop Kebabs

    Extra cooking guidance and practical tips

    Use a pot with a thick base and a lid that fits securely. A thin pot can develop hot spots and scorch the rice during dum. If your cookware is light, place a flat tawa beneath it to diffuse heat. Keep the flame very low once the pot is covered, because the goal is gentle steam rather than vigorous frying.

    Allow the biryani to rest for several minutes after switching off the heat. This helps steam settle and makes it easier to lift the rice without breaking the grains. Use a wide spoon and lift from the side rather than stirring the entire pot aggressively.

    Fried onions add sweetness and depth. Slice them evenly so they brown at a similar rate, and remove them from the oil when they are golden rather than very dark. They continue to darken slightly after being removed. Drain on a plate and scatter over the layers.

    Mint and coriander contribute freshness, while lemon gives a bright finish. Use fresh herbs and distribute them in a thin layer rather than adding a large clump in one place. If you do not enjoy mint, reduce it and use more coriander.

    Make the dish your own by adjusting the chilli and whole spices, but keep the rice-to-liquid balance under control. A good biryani has separate grains with flavourful chicken underneath. Careful parboiling and gentle dum are more important than adding many extra spices.

    Before serving, check that the chicken pieces are hot and cooked through. If you have prepared the masala ahead, cool it promptly and refrigerate it rather than leaving it on the counter. Reheat thoroughly before layering with freshly parboiled rice.

    More helpful tips for home cooks

    Rice parboiling is one of the most important stages. Bring a large pot of water to a boil and season it lightly with salt. Add the soaked, drained rice and cook until the grains are elongated but still firm in the middle. The exact time varies by rice brand, so begin checking early. Drain immediately when the rice reaches this stage.

    Use a slotted spoon to handle the rice gently if you need to move it into the layering pot. Avoid pressing down on the grains. They will soften further during steaming, so slightly undercooked rice at this stage is preferable to rice that is already fully soft.

    Chicken pieces should be similar in size. Smaller pieces cook more quickly, while large bone-in pieces need longer. If your pieces vary widely, remove the smaller cooked pieces temporarily and return them when layering, or cut the chicken into more even portions before cooking.

    Fried onions can be prepared in advance, but store them only after they have cooled completely. If covered while warm, trapped steam can soften them. Keep them in a dry airtight container for a short period and add them between layers or as a garnish.

    Do not stir the biryani like a curry after the dum stage. The rice grains are delicate. Lift portions gently from the side of the pot so you can serve both rice and chicken without crushing the layers.

    To make a balanced plate, pair the biryani with a simple raita made from plain yogurt, cucumber and a little salt. A fresh salad with onion, tomato and lemon adds crunch. These sides provide contrast without competing with the aromatic rice.

    Final preparation notes

    For a more fragrant finish, use fresh mint and coriander rather than dried herbs. Wash them, dry them well and chop shortly before layering. Wet herbs can add unwanted moisture to the rice, so shake off excess water and pat them dry before use.

    If the chicken masala tastes too sharp from the tomatoes, allow it to simmer until the raw tomato flavour softens. A little yogurt can round out the sauce, but the key is to cook it gently and reduce excess moisture before adding the rice.

    Helpful details for consistent results

    If you like a stronger aroma, add whole spices to the oil before frying the onions, then remove any large pieces before serving if you prefer. Cinnamon, cloves and cardamom can be potent, so use them lightly and let them infuse the oil without burning.

    A little saffron steeped in warm milk can be drizzled over the rice before dum, but it is optional. The main biryani flavour should come from the chicken masala, onions, herbs and correctly cooked rice rather than colour alone.