
Tag: Breakfast Ideas

  • Masala Omelette Recipe – Quick Pakistani Breakfast

    Masala Omelette Recipe – Quick Pakistani Breakfast

    This quick masala omelette is full of fresh flavour and works well with toast or paratha.

    Ingredients

    • 2 eggs
    • 2 tbsp finely chopped onion
    • 1 green chilli, finely chopped
    • 1 tbsp chopped coriander
    • Pinch of turmeric and black pepper
    • Salt to taste
    • 1 tsp oil or butter

    Method

    1. Whisk eggs with onion, chilli, coriander, turmeric, pepper and salt.
    2. Heat oil or butter in a non-stick pan over medium heat.
    3. Pour in the egg mixture and spread gently.
    4. Cook until the base is set, fold and cook until fully set.
    5. Serve hot with bread, paratha or salad.

    Masala Omelette at a glance

    Preparation5 minutes
    Cooking5 minutes
    Total time10 minutes
    Servings1
    DifficultyEasy

    Times are estimates and may vary with your equipment and experience. Adjust seasoning to taste and follow safe food-handling practices.

    Frequently asked questions

    Can I add vegetables?

    Yes. Finely chopped tomato, capsicum or spinach can be added.

    How do I keep the omelette soft?

    Cook over medium-low heat and avoid overcooking.

    What can I serve with it?

    Serve with toast, paratha or a simple salad.

    Extra cooking guidance and practical tips

    Use fresh eggs and crack them into a separate small bowl before adding them to the mixing bowl. This makes it easier to remove a shell fragment and helps you check the eggs before mixing. Beat until the whites and yolks are combined, but there is no need to whip in a large amount of air.

    Chop the onion and green chilli finely so they soften quickly and distribute evenly through the egg. Large pieces can make the omelette difficult to fold. Tomato is an optional addition; remove excess watery seeds if you want a firmer omelette.

    Heat the pan before adding the egg mixture, but keep the flame moderate. If the pan is too hot, the base may brown before the top begins to set. A non-stick pan makes folding easier, while a well-seasoned small frying pan can also work.

    When the edges begin to set, gently lift them with a spatula and allow uncooked egg to flow underneath. Fold when the centre is nearly set, then cook until the egg is fully cooked. Avoid leaving it on high heat for too long because the omelette can become dry.

    Masala omelette is flexible. Add chopped capsicum, spinach or a little grated cheese if you enjoy those flavours. Keep additions finely chopped and use a modest quantity so the egg can still hold together. Adjust chilli to suit the people at the table.

    Serve immediately with roti, paratha, toast or a simple salad. It can be used as a quick breakfast or light supper. Because eggs are best freshly cooked, prepare the vegetables ahead but cook the omelette close to serving time.

    More helpful tips for home cooks

    Season the eggs evenly by whisking the salt and spices into the mixture before it reaches the pan. If salt is added only to the surface after cooking, the flavour may not be distributed through the omelette. A pinch of turmeric gives a warm colour, while black pepper adds gentle heat.

    Use a small or medium pan for a two-egg omelette. In a very large pan, the mixture spreads too thinly and can dry out before it is folded. If cooking more servings, make separate omelettes rather than pouring a large quantity into one pan.

    Let the pan warm before adding the oil, then swirl the oil to coat the cooking surface. Pour the egg mixture in and tilt the pan so it spreads evenly. Use a spatula to move the setting edges inward gently, allowing uncooked egg to flow into the gaps.

    If you prefer a folded omelette, add any optional filling to one half when the surface is nearly set, then fold the other half over it. Keep the filling amount modest so the omelette closes neatly and the centre heats through.

    Cook eggs until the mixture is fully set. If you are preparing food for young children, older adults, pregnant people or anyone at higher risk from foodborne illness, take extra care to cook eggs thoroughly and use clean utensils.

    Masala omelette is best eaten soon after cooking. If you need to prepare several servings, keep the cooked omelettes hot and covered briefly rather than leaving them at room temperature. Prepare the chopped vegetables in advance to make the final cooking quick.

    Final preparation notes

    A non-stick spatula can help fold the omelette without scratching the pan. If using a metal utensil, check that it is suitable for your cookware. Move gently so the omelette stays in one piece, especially when the egg is nearly set.

    For a tomato version, remove excess juice and chop the tomato finely. Too much tomato liquid can make the egg mixture watery and lengthen the cooking time. Capsicum, spinach and spring onion are other additions that work well in small quantities.

    If you are making omelettes for several people, whisk each portion separately or divide the mixture evenly. Cooking one large pan of eggs can make it difficult to control thickness and doneness. Keep the first portions warm while the remaining ones cook.

    You can make the omelette more substantial by serving it inside warm bread with cucumber and a little chutney. For a lower-effort plate, pair it with sliced tomato and fruit. The recipe is flexible enough for breakfast or a quick evening meal.

    Clean the pan after it cools and wash the bowl and whisk that touched raw egg with hot soapy water. Keep raw egg away from ready-to-eat foods and wash hands after cracking eggs.

    Helpful details for consistent results

    If you want a browned surface, allow the first side to cook undisturbed until it releases easily from the pan. Trying to flip too early can tear the omelette. A flexible spatula helps support the egg as you fold it.

    For a soft, tender omelette, avoid pressing it flat with the spatula. Pressing squeezes out moisture and can make the texture dense. Let the egg set gently and remove it from the pan once it is fully cooked.

    The amount of salt can be adjusted depending on what you serve alongside. If the omelette is going into a sandwich with chutney or cheese, use a little less salt in the egg mixture. Taste the accompaniments before seasoning heavily.

    Keep the chopped coriander dry before adding it to the eggs. Excess water can thin the mixture. If you wash herbs in advance, dry them well and store them wrapped in a clean towel in the refrigerator.

    A simple omelette is a useful way to use small amounts of leftover vegetables. Make sure cooked leftovers have been stored safely, chop them finely and warm them before adding if necessary. Avoid adding too much filling, which can stop the egg from folding neatly.

    More serving and preparation advice

    A small pinch of cumin or crushed coriander seed can add a different aroma without making the omelette complicated. Use only a little so the spices do not overpower the eggs. Fresh herbs are usually enough for a quick breakfast version.

    If the omelette sticks, the pan may not be properly heated or may need a little more oil. Let the egg set around the edges before loosening it. Avoid scraping aggressively, as that can break the omelette into pieces.

    For a lunchbox, cook the omelette fully and allow it to cool safely before packing it with bread or roti. Use an insulated lunch bag with a cold pack if it will not be eaten soon. Egg dishes should not sit at room temperature for extended periods.

    The easiest way to improve a basic omelette is to control the heat and keep the vegetable pieces small. Extra ingredients are optional. A well-cooked egg with balanced salt, chilli and coriander can be more satisfying than a crowded filling.

    Extra notes for serving at home

    To make the recipe more filling, serve the omelette with whole-wheat roti and cucumber slices. If you want a lighter breakfast, pair it with tomato and coriander salad. The omelette itself takes only a few minutes, so prepare the sides while the pan heats.

    Keep the flame moderate from the beginning. A gentle sizzle helps the egg set evenly and gives you time to fold it without browning too deeply. If the edges are setting much faster than the middle, reduce the heat and cover the pan briefly to help the top cook.

    For a dairy-free cooking option, use oil instead of butter. A neutral oil lets the flavour of eggs, onion and herbs remain clear. Ghee can also be used for a richer aroma, but use a small amount so the omelette does not feel greasy.

    If you are unsure about seasoning, cook a tiny spoonful of the egg mixture first and taste it once fully cooked. Adjust the remaining mixture before pouring it into the pan. This simple check helps avoid an omelette that is too salty or spicy.

    Masala omelette is easy to adapt, but keep the egg-to-filling ratio balanced. The vegetables should add flavour and colour without overwhelming the eggs, allowing the omelette to cook evenly and fold neatly.
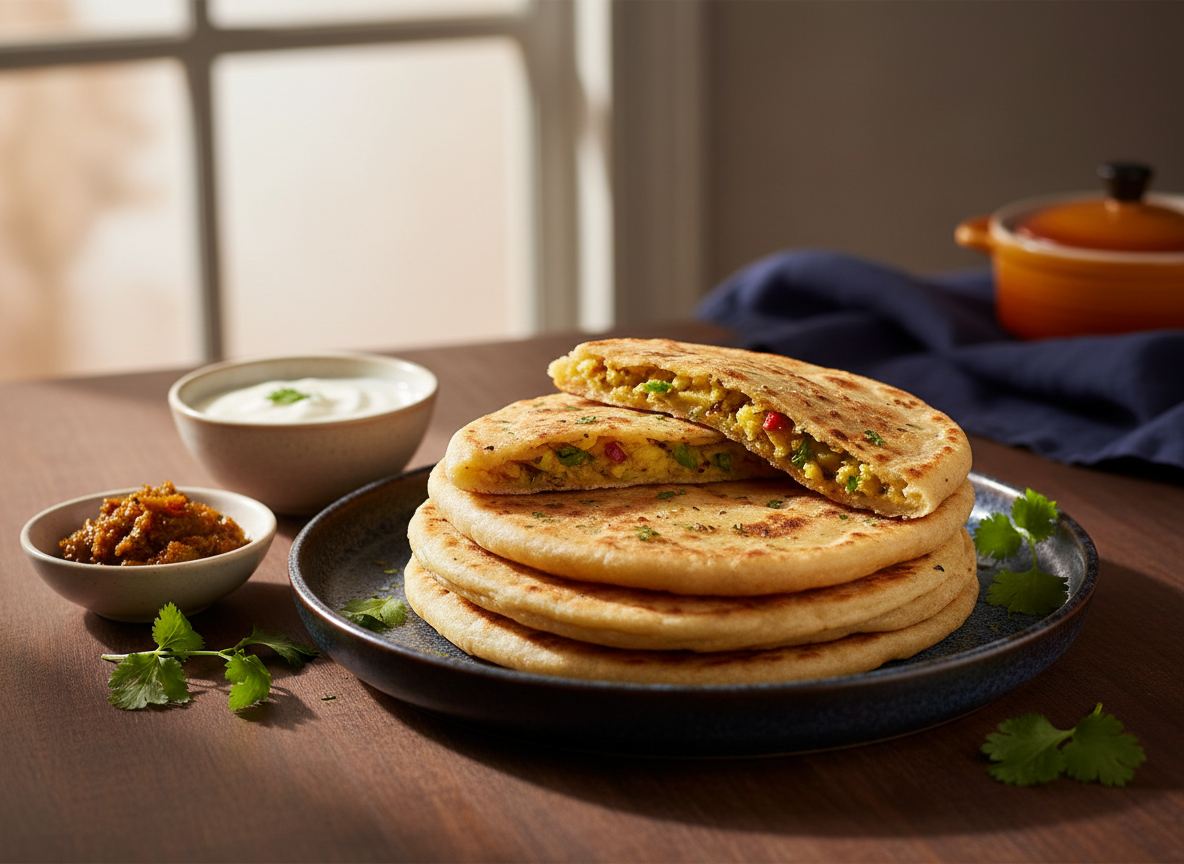
  • Aloo Paratha Recipe – Crispy, Stuffed Potato Paratha

    Aloo Paratha Recipe – Crispy, Stuffed Potato Paratha

    Aloo Paratha Recipe is a comforting stuffed flatbread made with whole-wheat dough and a seasoned potato filling. It is popular for breakfast, lunch boxes and simple dinners because it uses inexpensive ingredients and can be served with yogurt, pickle or chutney. A good paratha has a soft centre, a well-seasoned filling and a lightly crisp surface with golden spots.

    This guide explains the ingredients, preparation and cooking method in a practical order. Read through the method once before starting, measure the ingredients and prepare your cooking area. Small details such as dough texture, moisture level and heat control make a noticeable difference to the final result.

    The quantities are a starting point for a home kitchen. Ingredient sizes and moisture vary, so use the visual and texture cues in the instructions. Adjust seasoning gradually rather than adding a large amount at once.

    If you are cooking for guests, prepare the ingredients in advance and cook the dish close to serving time. Freshly cooked bread and kebabs are at their best when served warm; halwa can be held briefly and reheated gently.

    Recipe at a glance

    Preparation: 15 minutes. Cooking: 20 minutes. Servings: 3–4. Method: stovetop. Difficulty: easy to medium. Times are estimates and depend on equipment, ingredient temperature and portion size.

    Ingredients

    • 2 cups whole-wheat flour
    • Water as needed and a pinch of salt for the dough
    • 2 medium potatoes, boiled, peeled and mashed
    • 1 green chilli, finely chopped
    • 2 tbsp chopped coriander
    • ½ tsp cumin
    • ½ tsp coriander powder
    • Salt to taste
    • Ghee or oil for cooking

    Choose fresh ingredients and measure them before cooking. Keep salt and chilli adjustable to your taste. Use clean utensils and separate equipment for raw meat where applicable. If an ingredient is optional, leave it out rather than replacing it with a large amount of another seasoning.

    The quality and condition of the main ingredient affect the result. Potatoes should be cooked until tender; mince should be kept chilled until mixing; flour should be fresh and stored dry. Preparing ingredients consistently helps them cook evenly.

    Equipment and preparation

    Use a stable, clean cooking surface and a pan suited to the quantity. A heavy pan distributes heat more evenly and is less likely to develop hot spots. Keep a plate ready for cooked portions and use tongs or a spatula to turn food safely.

    Complete the chopping, measuring and mixing before heating the pan. This is especially helpful when frying or cooking over a hot tawa, because the food may need attention throughout the process. Keep children away from hot oil and the stove.

    Step-by-step method

    1. Place the flour and salt in a bowl. Add water gradually and mix until a dough forms. Knead until smooth and soft, but not sticky.
    2. Cover the dough and rest it for about 15 minutes. Resting allows the flour to absorb water and makes rolling easier.
    3. Mash the boiled potatoes thoroughly. Remove large lumps because they can tear the dough while rolling.
    4. Mix the potato with green chilli, coriander, cumin, coriander powder and salt. Taste a tiny amount of the filling and adjust the seasoning before stuffing.
    5. Divide the dough into equal balls and the filling into portions. Flatten one dough ball, place filling in the centre and bring the edges together to seal.
    6. Dust lightly with flour and roll gently into a round paratha. Use even pressure and turn the dough as you roll so the filling spreads without breaking through.
    7. Heat a tawa over medium heat. Place the paratha on it and cook until small bubbles appear. Flip, brush with a little ghee or oil, then turn again and cook until both sides have golden brown spots and the dough is cooked through.

    Texture, flavour and heat control

    The filling should be cool and fairly dry before stuffing. If the potatoes are wet or lumpy, the dough may tear. Roll gently, dusting only as much flour as needed.

    Heat control matters as much as the ingredient list. If the surface browns too quickly, lower the heat so the centre has time to cook. If food is pale and releasing moisture, the pan may be crowded or not hot enough. Work in batches when necessary and allow the pan to recover its heat between batches.

    Taste and adjust only when it is safe and appropriate to do so. A little lemon, fresh coriander or chutney at the table can brighten the dish without changing the main cooking process. Avoid over-seasoning early, because flavours become more concentrated as moisture evaporates.

    Common mistakes to avoid

    One common mistake is rushing preparation. Unevenly cut ingredients or poorly mixed seasoning can lead to inconsistent results. Take a moment to make portions similar in size so they cook at roughly the same rate.

    Another mistake is using excessive heat from beginning to end. High heat may be useful for starting a cook, but many dishes need moderate heat to finish properly. Watch the food rather than relying only on the stove setting.

    Adding too much liquid can affect texture. Follow the quantities and add extra water only when the method calls for it. If a mixture becomes too wet, pause and correct the texture before shaping or cooking rather than trying to fix it in the pan.

    Variations and substitutions

    Add a pinch of chilli flakes, amchur or roasted cumin if you enjoy a tangier filling. For children or anyone who prefers mild food, leave out the green chilli and use coriander and cumin for flavour.

    You can adjust the seasoning to match the meal and the people eating it. Keep the core method the same while changing only one or two elements at a time. This makes it easier to understand how a substitution changes the taste or texture.

    For a larger gathering, cook in batches rather than doubling everything in one crowded pan. If scaling a recipe, check that the pan is large enough and that the centre of each portion cooks safely.

    Serving suggestions

    Serve the dish with simple accompaniments that balance its flavour. Fresh salad, plain yogurt, chutney or lemon can add freshness. Choose one or two sides rather than making the plate too crowded.

    For a family meal, place accompaniments in separate bowls so everyone can choose what they enjoy. Keep hot foods hot and chilled sides refrigerated until serving.

    If serving as part of a larger spread, prepare the sides first and cook the main item last. This helps the hot food reach the table at its best texture.

    Storage and food safety

    Cool cooked food promptly and store it in a covered container in the refrigerator. Do not leave perishable food at room temperature for more than two hours, or one hour in very hot conditions above 32°C (90°F). Refrigerate leftovers promptly and use them within three to four days.

    Reheat leftovers until steaming hot throughout. For meat dishes, use a food thermometer to check safe doneness and reheating temperatures. Do not repeatedly cool and reheat the same batch; reheat only the portion you intend to eat.

    If freezing, use an airtight freezer-safe container and label it with the date. Thaw in the refrigerator rather than on the counter. Texture can change after freezing, so stir or reshape gently as appropriate when reheating.

    Frequently asked questions

    How do I stop the paratha from tearing? Use a soft but not sticky dough, cool and dry filling, and gentle rolling pressure.

    Can I prepare the filling ahead? Yes. Refrigerate it in a covered container and use it within a safe period; bring it out shortly before shaping.

    Can I freeze uncooked parathas? Layer rolled parathas with baking paper and freeze flat in a suitable container. Cook from frozen over moderate heat, allowing extra time.

    Why is my paratha hard? The dough may be too firm, the tawa too hot or the paratha cooked for too long. Adjust the dough and heat.

    What goes well with aloo paratha? Yogurt, pickle, mint chutney or a cup of tea make simple accompaniments.

    Final thoughts

    This recipe is designed to be manageable with everyday kitchen equipment and familiar ingredients. Take time to prepare the components, watch the texture as it cooks and adjust the seasoning to suit your household. Once you have made it once, you will know which parts can be prepared ahead and which are best done just before serving.

    For more home-cooking inspiration, explore the other recipes on KitchenVibez and build a meal plan around the ingredients you already have.

    Extra cooking guidance and practical tips

    Choose potatoes that mash smoothly after boiling. Drain them well and allow excess steam to escape before mashing. If the potato filling is wet, it may push through the dough when rolled. A dry, evenly seasoned filling is easier to portion and produces a more consistent paratha.

    Do not overfill the dough. A moderate amount of filling leaves enough dough around it to seal securely. Pinch the gathered edges together and remove any thick excess dough before rolling. This prevents a dense knot in the middle and helps the paratha cook evenly.

    Use a medium-hot tawa rather than an extremely hot one. If the surface browns before the inside cooks, reduce the heat. If the paratha remains pale and dry for a long time, increase the heat slightly. Every stove behaves differently, so watch the colour and feel of the bread.

    Brush ghee or oil in a thin layer. Too much fat can make the bread heavy, while too little may leave it dry. Turn the paratha more than once if needed so both sides cook evenly and the filling becomes hot throughout.

    For meal preparation, boil the potatoes and mix the filling ahead, then refrigerate it in a covered container. Make the dough closer to cooking time for a softer result. Keep uncooked dough covered so its surface does not dry out.for more informationHalwa Puri Recipe – Pakistani Breakfast Plate

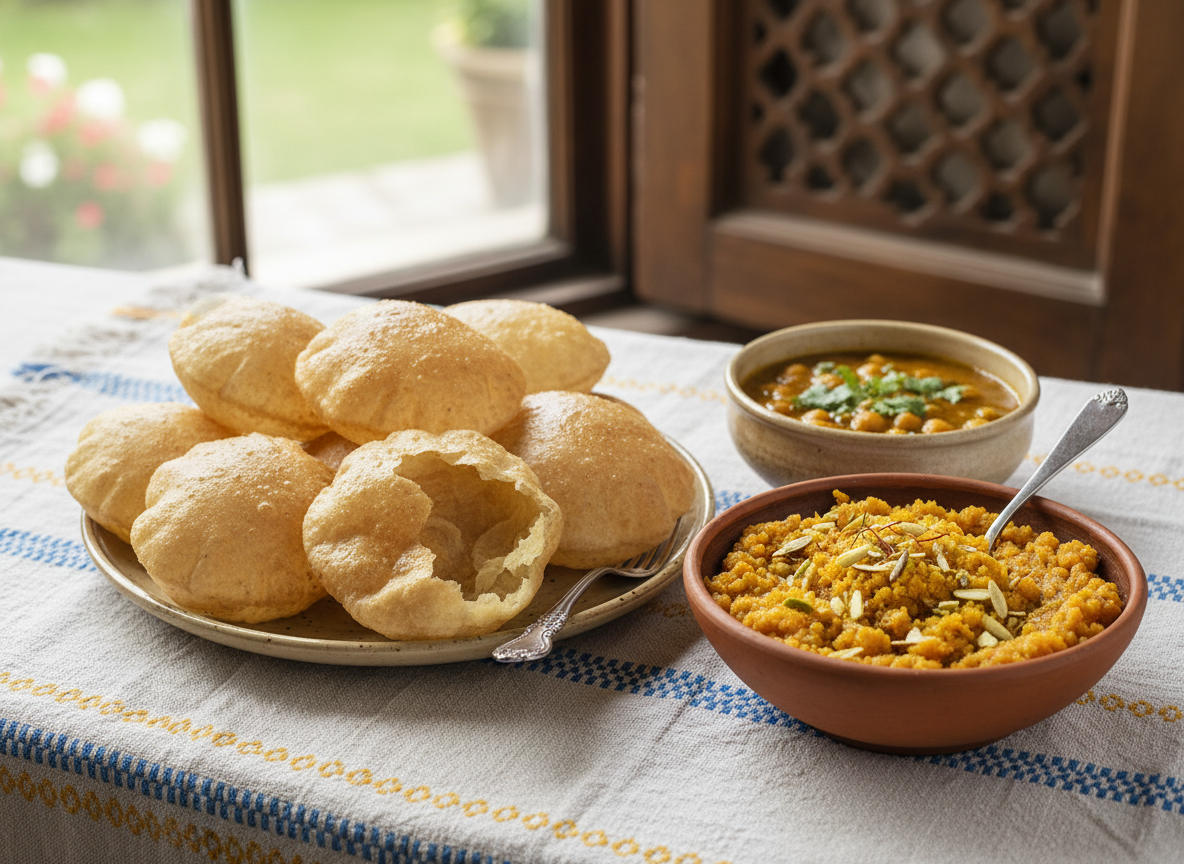
  • Halwa Puri Recipe – Pakistani Breakfast Plate

    Halwa Puri Recipe – Pakistani Breakfast Plate

    Halwa Puri Recipe is a much-loved Pakistani breakfast combination that brings together soft, sweet semolina halwa and freshly fried puri. It is often served for a leisurely weekend breakfast, family gathering or festive morning. The contrast between the rich halwa and crisp, puffed bread makes the plate feel special, while the ingredients are familiar pantry staples.

    This guide explains the ingredients, preparation and cooking method in a practical order. Read through the method once before starting, measure the ingredients and prepare your cooking area. Small details such as dough texture, moisture level and heat control make a noticeable difference to the final result.

    The quantities are a starting point for a home kitchen. Ingredient sizes and moisture vary, so use the visual and texture cues in the instructions. Adjust seasoning gradually rather than adding a large amount at once.

    If you are cooking for guests, prepare the ingredients in advance and cook the dish close to serving time. Freshly cooked bread and kebabs are at their best when served warm; halwa can be held briefly and reheated gently.

    Recipe at a glance

    Preparation: 25 minutes. Cooking: 35 minutes. Servings: 4. Method: stovetop. Difficulty: easy to medium. Times are estimates and depend on equipment, ingredient temperature and portion size.

    Ingredients

    • 1 cup semolina (suji)
    • ½ cup ghee
    • ¾ cup sugar, or adjust to taste
    • 3 cups water
    • 2 green cardamom pods
    • Chopped almonds or pistachios for garnish
    • For puri: 2 cups wheat flour or all-purpose flour, a pinch of salt, water as needed and oil for deep frying

    Choose fresh ingredients and measure them before cooking. Keep salt and chilli adjustable to your taste. Use clean utensils and separate equipment for raw meat where applicable. If an ingredient is optional, leave it out rather than replacing it with a large amount of another seasoning.

    The quality and condition of the main ingredient affect the result. Potatoes should be cooked until tender; mince should be kept chilled until mixing; flour should be fresh and stored dry. Preparing ingredients consistently helps them cook evenly.

    Equipment and preparation

    Use a stable, clean cooking surface and a pan suited to the quantity. A heavy pan distributes heat more evenly and is less likely to develop hot spots. Keep a plate ready for cooked portions and use tongs or a spatula to turn food safely.

    Complete the chopping, measuring and mixing before heating the pan. This is especially helpful when frying or cooking over a hot tawa, because the food may need attention throughout the process. Keep children away from hot oil and the stove.

    Step-by-step method

    1. Warm the water with sugar and cardamom until the sugar dissolves. Keep it warm while preparing the semolina.
    2. Heat ghee in a heavy pan. Add semolina and roast over low to medium-low heat, stirring continuously so it colours evenly without burning.
    3. When the semolina smells nutty and looks lightly golden, carefully add the warm sweetened water in a steady stream while stirring. Take care because the mixture can bubble and splash.
    4. Stir until the liquid is absorbed and the halwa thickens. Cover briefly over very low heat, then fluff and garnish with nuts.
    5. For puri, mix flour and salt. Add water gradually and knead to a firm, smooth dough. Cover and rest for about 15 minutes.
    6. Divide the dough into small balls. Roll each into an even disc, keeping the centre and edges a similar thickness.
    7. Heat oil in a deep pan. Slide in one disc carefully and press gently with a slotted spoon so it puffs. Turn once and fry until lightly golden. Drain well and repeat.

    Texture, flavour and heat control

    Roasting semolina patiently is the key to halwa with a pleasant aroma. Keep stirring and avoid using very high heat. Add the warm syrup carefully and keep stirring to prevent lumps.

    Heat control matters as much as the ingredient list. If the surface browns too quickly, lower the heat so the centre has time to cook. If food is pale and releasing moisture, the pan may be crowded or not hot enough. Work in batches when necessary and allow the pan to recover its heat between batches.

    Taste and adjust only when it is safe and appropriate to do so. A little lemon, fresh coriander or chutney at the table can brighten the dish without changing the main cooking process. Avoid over-seasoning early, because flavours become more concentrated as moisture evaporates.

    Common mistakes to avoid

    One common mistake is rushing preparation. Unevenly cut ingredients or poorly mixed seasoning can lead to inconsistent results. Take a moment to make portions similar in size so they cook at roughly the same rate.

    Another mistake is using excessive heat from beginning to end. High heat may be useful for starting a cook, but many dishes need moderate heat to finish properly. Watch the food rather than relying only on the stove setting.

    Adding too much liquid can affect texture. Follow the quantities and add extra water only when the method calls for it. If a mixture becomes too wet, pause and correct the texture before shaping or cooking rather than trying to fix it in the pan.

    Variations and substitutions

    For a lighter sweetness, reduce the sugar slightly and serve the halwa with a savoury chickpea curry. You can use a mix of wheat flour and all-purpose flour for puri, adjusting water until the dough is firm but pliable.

    You can adjust the seasoning to match the meal and the people eating it. Keep the core method the same while changing only one or two elements at a time. This makes it easier to understand how a substitution changes the taste or texture.

    For a larger gathering, cook in batches rather than doubling everything in one crowded pan. If scaling a recipe, check that the pan is large enough and that the centre of each portion cooks safely.

    Serving suggestions

    Serve the dish with simple accompaniments that balance its flavour. Fresh salad, plain yogurt, chutney or lemon can add freshness. Choose one or two sides rather than making the plate too crowded.

    For a family meal, place accompaniments in separate bowls so everyone can choose what they enjoy. Keep hot foods hot and chilled sides refrigerated until serving.

    If serving as part of a larger spread, prepare the sides first and cook the main item last. This helps the hot food reach the table at its best texture.

    Storage and food safety

    Cool cooked food promptly and store it in a covered container in the refrigerator. Do not leave perishable food at room temperature for more than two hours, or one hour in very hot conditions above 32°C (90°F). Refrigerate leftovers promptly and use them within three to four days.

    Reheat leftovers until steaming hot throughout. For meat dishes, use a food thermometer to check safe doneness and reheating temperatures. Do not repeatedly cool and reheat the same batch; reheat only the portion you intend to eat.

    If freezing, use an airtight freezer-safe container and label it with the date. Thaw in the refrigerator rather than on the counter. Texture can change after freezing, so stir or reshape gently as appropriate when reheating.

    Frequently asked questions

    Can I make halwa ahead? Yes. Prepare it earlier and reheat gently with a small splash of water if it has become firm.

    Why is my halwa lumpy? The liquid may have been added too quickly or the mixture was not stirred continuously. Add it gradually and whisk or stir firmly.

    Why do puris not puff? Uneven rolling, dough that is too soft or oil that is not hot enough can prevent puffing. Roll evenly and fry one at a time.

    Can I use less ghee? You can reduce it, although the texture and roasted flavour will be less rich.

    What can I serve with halwa puri? Chana masala, potato curry, pickle and yogurt are common accompaniments.

    Final thoughts

    This recipe is designed to be manageable with everyday kitchen equipment and familiar ingredients. Take time to prepare the components, watch the texture as it cooks and adjust the seasoning to suit your household. Once you have made it once, you will know which parts can be prepared ahead and which are best done just before serving.

    For more home-cooking inspiration, explore the other recipes on KitchenVibez and build a meal plan around the ingredients you already have.

    Extra cooking guidance and practical tips

    Make the halwa texture your guide. When the semolina is first roasted, it should smell pleasantly nutty rather than smoky. If it darkens too quickly, lower the flame and move the pan off the heat briefly. Semolina continues to toast in a hot pan, so steady stirring is more reliable than trying to roast it quickly.

    When adding the sweetened water, protect your hands and face from steam. Pour slowly and keep the spoon moving. A long-handled spoon is useful because the mixture can bubble vigorously. Once the liquid is absorbed, cover only briefly; leaving it covered for too long can make the bottom stick.

    Resting the puri dough helps it relax, but the dough should remain firm enough to roll. If it feels sticky, dust the work surface lightly rather than adding a large amount of flour. Too much dry flour can fall into the frying oil and darken it.

    Keep the rolled discs covered with a clean cloth while you fry the batch. This prevents them drying at the edges. Fry one at a time so the oil temperature does not drop sharply. If the oil smokes, lower the heat before adding another puri.

    Use a slotted spoon to drain each puri over the pan before placing it on a rack or paper towel. Stacking them tightly while very hot traps steam and softens the surface. Serve soon after frying for the best contrast with the warm halwa.for more informationChicken Karahi Recipe – Pakistani Tomato Chicken Karahi