Tag: Traditional Food

  • Rice Kheer Recipe – Creamy Pakistani Rice Pudding

    Rice Kheer Recipe – Creamy Pakistani Rice Pudding

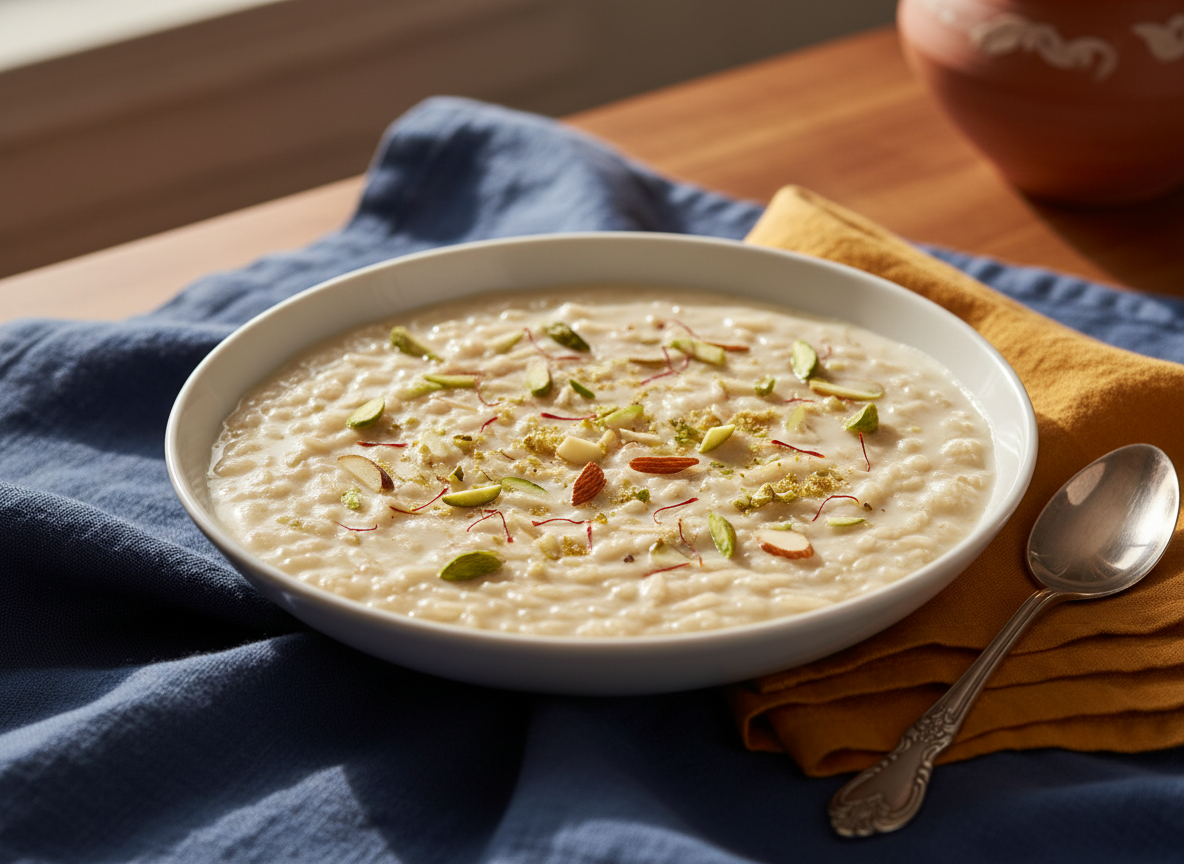
    Rice Kheer Recipe is a gently simmered milk pudding. Stir regularly so the milk does not catch at the bottom of the pan.

    Ingredients

    • ¼ cup basmati rice, rinsed and soaked
    • 1 litre milk
    • ⅓–½ cup sugar, to taste
    • 3 green cardamom pods, lightly crushed
    • Chopped almonds and pistachios
    • A few strands of saffron (optional)

    Method

    1. Bring milk to a gentle simmer in a heavy pan.
    2. Add drained rice and cardamom. Cook on low heat, stirring frequently.
    3. When the rice is soft and the milk has thickened, add sugar.
    4. Simmer for a few more minutes, then remove from heat.
    5. Garnish with nuts and saffron. Serve warm or chilled.

    Rice Kheer at a glance

    Preparation5 minutes
    Cooking50 minutes
    Total time55 minutes
    Servings6
    DifficultyEasy

    Times are estimates and may vary with your equipment and experience. Adjust seasoning to taste and follow safe food-handling practices.

    Frequently asked questions

    Why does kheer thicken as it cools?

    Rice starch continues to thicken the milk pudding as it cools.

    Can I serve rice kheer chilled?

    Yes. Cool it safely and refrigerate before serving.

    How do I stop milk sticking?

    Use a heavy pan and stir regularly over low heat.

    Extra cooking guidance and practical tips

    Choose a heavy-bottomed pot to reduce the chance of milk catching on the base. A wide pan allows moisture to evaporate, but a deeper pot can reduce splashing. Whichever you use, keep the heat gentle and stir often, especially around the bottom edge.

    Rinsing and soaking the rice helps remove excess surface starch and encourages more even cooking. Drain it before adding to the milk. Some cooks lightly crush a portion of the soaked rice to thicken the pudding more quickly; this is optional and changes the final texture.

    Do not add all the sugar at the beginning. Sweetened milk can take longer to reduce, and sugar may catch on the bottom if the pan is not stirred carefully. Add it once the rice is tender and the milk has begun to thicken, then simmer briefly to combine.

    Cardamom gives kheer its familiar fragrance. Crush the pods lightly so the flavour can infuse, and remove whole pods before serving if desired. Saffron is optional; if using it, steep a few strands in warm milk before adding.

    Kheer thickens as it cools because the rice continues to absorb liquid. Keep this in mind when deciding when to stop cooking. If it already looks very thick in the hot pan, it may become too firm after chilling. Leave it slightly looser than your preferred final texture.

    Serve kheer in small bowls, warm or chilled. Garnish with chopped almonds and pistachios just before serving. If you are serving people with nut allergies, leave the nuts off and use a little cardamom instead.

    More helpful tips for home cooks

    Use full-fat milk for a creamy result, or lower-fat milk if you prefer a lighter pudding. Lower-fat milk may take a little longer to develop the same rich mouthfeel. Avoid using flavoured or sweetened milk because it changes the balance of the recipe.

    Keep the milk at a gentle simmer rather than a rolling boil. A vigorous boil can cause it to foam over and may make the rice break apart. Stir in a slow figure-eight motion, scraping the bottom and sides so the rice does not settle and stick.

    The amount of sugar is flexible. Start with the lower quantity, allow it to dissolve, then taste carefully. Remember that chilled desserts can taste slightly less sweet than warm ones, so consider how you plan to serve the kheer before making a final adjustment.

    If the kheer becomes thicker than you like, stir in a little warm milk until it reaches the desired consistency. Add a small amount at a time. If it is too thin, continue simmering gently, stirring frequently, until some moisture evaporates.

    To serve chilled kheer, transfer it to shallow bowls or a covered container and refrigerate promptly. Do not leave the pot on the counter for hours to cool. Shallow portions cool more quickly and can be covered once the steam has subsided.

    For a subtle variation, add a few strands of saffron or a small splash of rose water near the end. These flavours can be strong, so use them sparingly. The classic combination of milk, rice and cardamom is delicious on its own.

    Final preparation notes

    If you want a thicker, more traditional pudding, continue reducing the milk slowly after the rice softens. Do not increase the flame to hurry the process. Gentle simmering gives the rice time to release starch and blend into the milk without scorching the base.

    For individual servings, portion the kheer into small cups while it is still pourable. Let it cool briefly, then refrigerate. Garnish each cup with nuts or cardamom just before serving. This makes the dessert easy to serve at family meals or gatherings.

    A clean spoon should be used each time you serve from a shared container. Do not return a spoon that has touched someone’s bowl to the storage container. Small handling habits help keep leftovers safe and fresh.

    If the rice grains remain firm while the milk is already thick, add a little warm milk and continue cooking over low heat. Stir often until the rice softens. This is better than turning the heat high, which can burn the milk.

    Avoid adding acidic ingredients such as lemon to milk kheer, as they can cause the milk to split. Keep the flavour profile simple with cardamom, saffron or a little rose water if desired.

    Helpful details for consistent results

    The pudding can be adapted for different textures. For a looser dessert, stop reducing the milk earlier and serve warm. For a thicker chilled kheer, simmer a little longer, remembering that it will firm up in the refrigerator. Keep notes of the rice brand and cooking time if you want to repeat a preferred result.

    If you are serving kheer after a spicy meal, a small chilled portion can be a gentle finish. Keep it refrigerated until serving and do not leave the bowls sitting out for an extended period. Return any untouched portions to the refrigerator promptly.

    Use a clean, dry measuring cup for rice and sugar. Measuring the rice consistently helps keep the pudding balanced. Too much rice can make the kheer dense, while too little may leave it thin unless it is reduced for a long time.

    When stirring, scrape the bottom with a wooden spoon or heat-safe spatula. A whisk can break up small clumps, but avoid vigorous whisking once the rice is soft because the grains can become mashed. A gentle stir keeps the texture appealing.

    Kheer is a forgiving recipe once you understand the reduction stage. If the first batch is thicker than you wanted, adjust the milk slightly next time. If it is thin, allow more time for simmering. Small changes are more useful than changing several ingredients at once.moreChana Chaat Recipe – Easy Pakistani Chickpea Snack

    More serving and preparation advice

    A traditional kheer is not meant to be rushed. Gentle cooking gives the rice time to soften and release starch into the milk. If you keep the flame low and stir consistently, you can develop a creamy texture without needing thickening agents.

    If you use a different rice variety, the cooking time may change. Some short-grain rice softens faster and releases more starch, while long-grain basmati may remain more distinct. Check the grains as they cook and adjust the simmering time rather than following the clock exactly.

    For a dairy-free experiment, use an unsweetened plant-based drink that is suitable for simmering, but expect a different flavour and consistency. The classic recipe relies on dairy milk, so substitutions should be treated as a variation rather than an identical result.

    Do not store kheer in a large warm pot for a long time. Divide it into smaller containers so it cools more quickly, then refrigerate. This is especially important in warm weather. Keep the refrigerator cold and avoid leaving individual bowls out after serving.

    Extra notes for serving at home

    A small amount of crushed pistachio or almond on top gives a gentle crunch, but the garnish is optional. If you prefer a completely smooth bowl, leave nuts out and add only a pinch of cardamom. The dessert should still taste rich from the slow-simmered milk and softened rice.

    When you make kheer regularly, note whether you prefer it warm or chilled and adjust the final reduction accordingly. Warm kheer can be served a little looser, while a chilled bowl needs enough body to remain creamy after refrigeration. A small adjustment in simmering time can make a noticeable difference.

    The recipe is also useful for using a small amount of leftover plain rice, although the texture will differ from cooking raw rice in milk. If using cooked rice, add it only after bringing the milk to a simmer and reduce the cooking time. Check that the rice is fresh and has been stored safely.

    For the best flavour, use plain milk and fresh cardamom rather than a strongly flavoured packaged dessert mix. The slow-cooked rice and milk create the pudding’s character, while the garnish should remain a small finishing touch.
  • Chana Chaat Recipe – Easy Pakistani Chickpea Snack

    Chana Chaat Recipe – Easy Pakistani Chickpea Snack

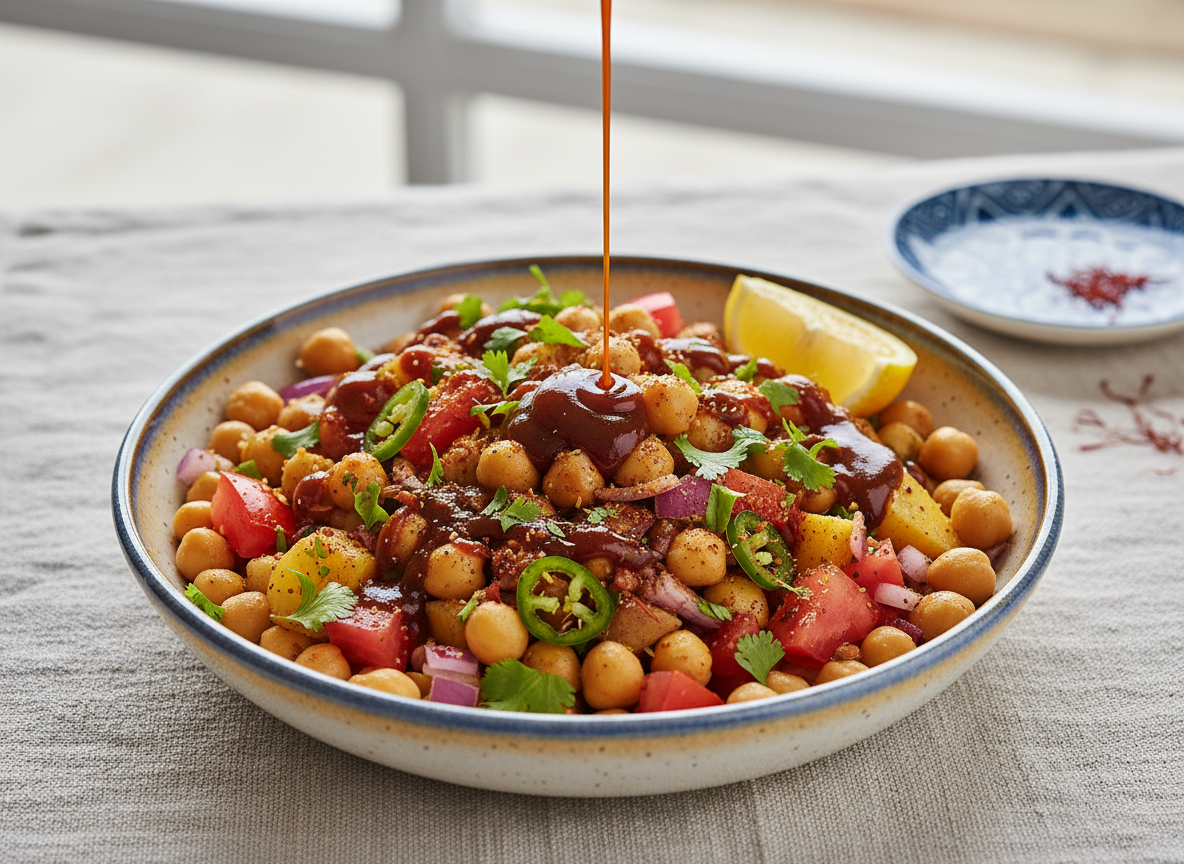
    This quick Chana Chaat Recipeis bright, tangy and easy to adjust. Use cooked chickpeas and add chutneys just before serving.

    Ingredients

    • 2 cups cooked chickpeas, drained
    • 1 small onion, finely chopped
    • 1 tomato, chopped
    • 1 small boiled potato, cubed (optional)
    • 2 tbsp tamarind chutney
    • 1 tbsp lemon juice
    • ½ tsp chaat masala
    • Green chilli and fresh coriander

    Method

    1. Place chickpeas in a bowl and add onion, tomato and potato.
    2. Mix in tamarind chutney, lemon juice and chaat masala.
    3. Toss gently, taste and adjust seasoning.
    4. Finish with green chilli and coriander. Serve straight away.

    Chana Chaat at a glance

    Preparation15 minutes
    Total time15 minutes
    Servings2
    DifficultyEasy

    Times are estimates and may vary with your equipment and experience. Adjust seasoning to taste and follow safe food-handling practices.

    Frequently asked questions

    Can I use canned chickpeas?

    Yes. Drain and rinse them well before mixing.

    How can I make it less spicy?

    Skip the green chilli and adjust chaat masala to taste.

    Can I prepare it in advance?

    Prepare the ingredients ahead, but mix in chutney shortly before serving.

    Preparing chickpeas for the best texture

    If you are cooking dried chickpeas, soak them in plenty of water according to package guidance, then boil until tender. They should hold their shape but be soft enough to bite easily. Drain thoroughly and allow them to cool before mixing the chaat. Canned chickpeas are a convenient alternative; drain and rinse them to remove the canning liquid.

    Avoid mixing very hot chickpeas with chopped tomato and onion if you want the vegetables to stay crisp. Let the chickpeas cool to room temperature or chill them first. If you prefer warm chaat, gently warm the chickpeas separately and combine shortly before serving.

    Balancing sweet, sour, salty and spicy flavours

    Tamarind chutney provides sweetness and tang, while lemon adds a fresher sour note. Chaat masala contributes saltiness and a distinctive spice blend. Start with the suggested amounts, toss, taste and then adjust. Different chutneys and spice blends vary in intensity, so it is better to add them gradually.

    Green chilli is optional. For a mild version, leave it out and let each person add chilli sauce at the table. Fresh coriander adds a herbal note, and finely chopped onion provides crunch. A small boiled potato makes the snack more filling but can be omitted.

    How to keep chaat from becoming soggy

    Add chutney and lemon shortly before serving. If the chaat sits for a long time, the chickpeas and vegetables release moisture and the texture becomes softer. Keep wet and dry ingredients separate when preparing ahead, then combine them just before the meal.

    Dice the tomato and potato into similar small pieces so every spoonful has a balanced mix. Remove excess watery tomato seeds if the tomatoes are especially juicy. Do not mash the chickpeas while tossing; fold gently with a large spoon.

    Variations and meal ideas

    For a more substantial bowl, add boiled potato, cucumber or a little finely shredded cabbage. Some households add yogurt for a creamy chaat; if using it, add just before serving and keep the bowl chilled until it reaches the table.

    You can make a simple chana chaat platter for guests by arranging chickpeas, chopped vegetables, chutneys, lemon wedges and coriander separately. This lets everyone build a bowl to their taste and helps keep the ingredients crisp.

    Storage and food safety

    Store cooked chickpeas and chopped vegetables separately in covered containers in the refrigerator. Combine only the portion you intend to serve. Do not leave the prepared chaat at room temperature for more than two hours, or one hour in very hot conditions above 32°C (90°F).

    If using canned chickpeas, refrigerate any unused portion in a suitable covered container and follow the package guidance. Discard food that has been left out too long or shows signs of spoilage.

    Extra cooking guidance and practical tips

    Chaat is best when each ingredient keeps its own character. Chickpeas should be tender but not crushed, onion should add a little sharpness, tomato should provide juiciness and the chutney should coat everything lightly. Toss with a gentle folding motion instead of vigorously stirring the bowl.

    Use a large mixing bowl so you can combine the ingredients without spilling. Add the chickpeas first, then vegetables and dry spices. Add chutney and lemon gradually, tasting between additions. This approach is useful because tamarind chutney and chaat masala brands can vary significantly in sweetness and salt.

    For a more colourful bowl, add finely chopped cucumber and fresh coriander. Keep the pieces small enough to mix easily but not so tiny that they disappear into the chickpeas. If you use potato, cook it until just tender so it holds its shape when tossed.

    Chana chaat can be served as an afternoon snack, a light lunch or part of a larger meal. For a more filling serving, offer it with papri or a small portion of plain yogurt. Add crunchy toppings just before eating so they do not become soft.

    If preparing for a gathering, arrange the ingredients in separate bowls and let guests assemble their own portions. Keep the chickpeas chilled and the chutneys covered. This is easier than mixing a large bowl far in advance and helps maintain a fresh texture.

    Adjust the sourness with lemon or tamarind, sweetness with chutney and heat with green chilli. There is no single balance that suits every household. Taste the mixture before serving and offer extra chutney on the side.infoGajar Ka Halwa Recipe – Pakistani Carrot Dessert

    More helpful tips for home cooks

    Chickpeas are the foundation of the dish, so their texture matters. If they are undercooked, they taste firm and can be difficult to season evenly. If they are overcooked, they collapse when mixed. Cook until tender, then drain thoroughly so the dressing clings rather than becoming diluted.

    A good chaat dressing should coat the ingredients without pooling at the bottom. Add the tamarind chutney in stages, toss, and look at the mixture before adding more. You can always serve extra chutney separately, but it is difficult to remove excess once mixed.

    Chaat masala can contain salt, dried mango powder and other spices. Taste the bowl before adding extra salt. If the mixture tastes flat, a little lemon may brighten it; if it is too sour, a small amount of tamarind chutney can balance it. Adjust one flavour at a time.

    Use a sharp knife to cut the onion and tomato into neat small pieces. Large chunks can dominate a spoonful, while pieces that are too tiny disappear. A consistent dice makes the bowl look attractive and distributes flavour evenly.

    For a more filling snack, serve chana chaat with a small portion of boiled potato or a handful of crunchy papri. Add crunchy elements at the last moment. If you are packing it for lunch, keep chutney in a separate small container and mix before eating.

    Make the recipe suitable for different tastes by setting out separate bowls of green chutney, tamarind chutney, yogurt and chopped chilli. Guests can add what they prefer. This is a practical way to serve a group when some people enjoy spicy food and others prefer a mild snack.

    Final preparation notes

    For a more refreshing version in warm weather, chill the cooked chickpeas and vegetables before assembling the bowl. Keep the chutneys refrigerated and mix just before serving. The cool ingredients make a pleasant contrast with the tangy seasoning.

    If you prefer a smoother dressing, whisk the tamarind chutney with lemon juice and a spoonful of water before adding it. This helps it spread evenly across the chickpeas. Add the mixture gradually so the snack does not become watery.

    Helpful details for consistent results

    A little boiled potato can make the bowl more filling, but add it gently so it does not break apart. If using papri or another crunchy topping, keep it separate until the last moment. This preserves the contrast between creamy chickpeas and crisp garnish.

    If you want a less sweet chaat, use less tamarind chutney and increase lemon gradually. If you prefer more sweetness, add a little more chutney rather than table sugar, which will not provide the same tangy depth.

    More serving and preparation advice

    For a neat presentation, spoon the chickpea mixture into shallow bowls and add a small drizzle of chutney across the top. Finish with coriander and a pinch of chaat masala. Keep garnishes light so the main ingredients remain visible.

    The recipe can be scaled for a group by multiplying the chickpeas and vegetables, but add chutney and lemon gradually. A large bowl may need less dressing than expected if the tomatoes are juicy. Mix in batches if that makes it easier to keep the texture intact.

    If you have leftover plain cooked chickpeas, use them in a salad or curry rather than leaving them unused. Store them covered in the refrigerator and use them within a few days. Keep them separate from the dressing until you are ready to prepare the chaat.

    Extra notes for serving at home

    If you are preparing the snack for a picnic or travel, pack the chickpeas, chopped vegetables and dressing separately in chilled containers. Assemble the bowl just before eating and keep it cool until serving. This helps preserve freshness and keeps the texture pleasant.

  • Gajar Ka Halwa Recipe – Pakistani Carrot Dessert

    Gajar Ka Halwa Recipe – Pakistani Carrot Dessert

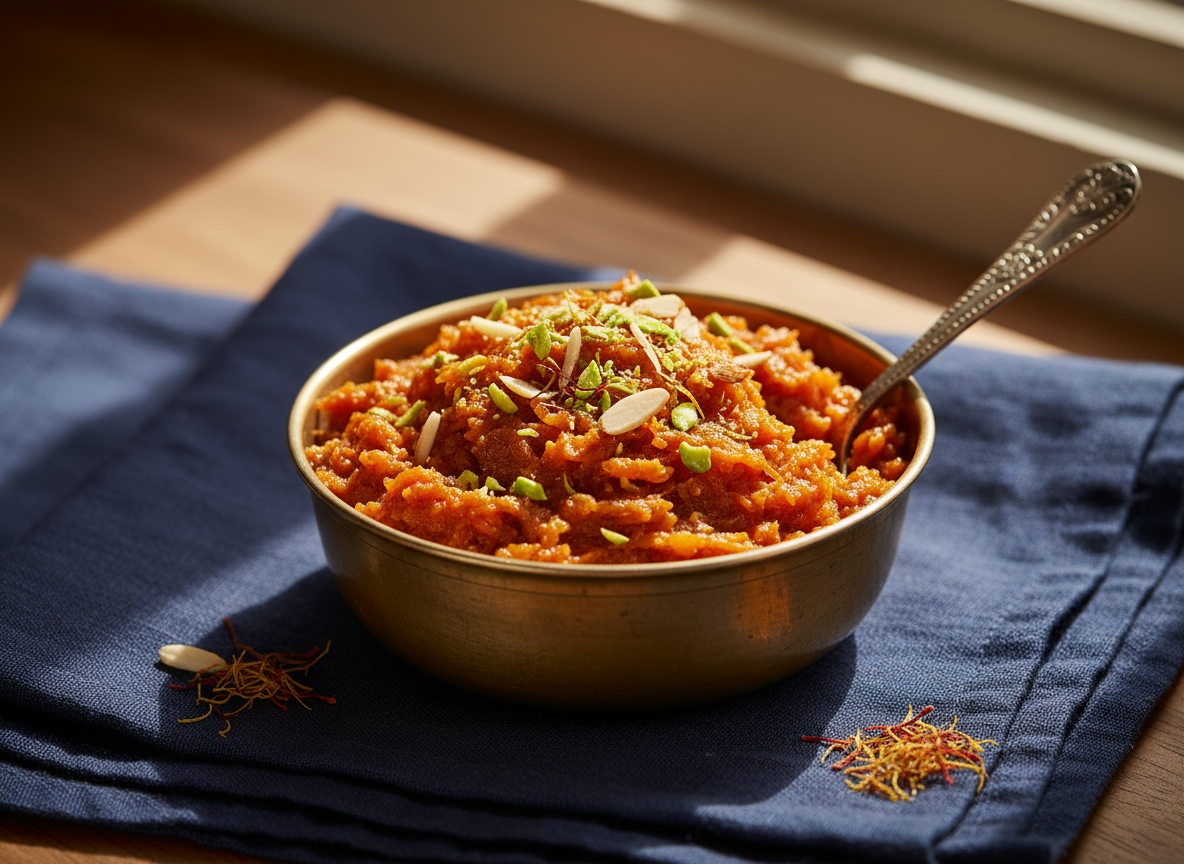
    Gajar Ka Halwa Recipe is a comforting carrot dessert. Slow cooking helps the carrots soften and the milk reduce.

    Ingredients

    • 1 kg carrots, peeled and grated
    • 1 litre full-fat milk
    • ½ cup sugar, adjust to taste
    • 3 tbsp ghee
    • 3 green cardamom pods
    • Chopped almonds and pistachios

    Method

    1. Add grated carrots and milk to a heavy pan. Simmer, stirring often, until the carrots soften and most of the milk evaporates.
    2. Add sugar and cardamom. The mixture may loosen as the sugar melts.
    3. Continue cooking until thick, then stir in ghee.
    4. Cook a few more minutes, stirring to prevent sticking.
    5. Garnish with nuts and serve warm or chilled.

    Gajar Ka Halwa at a glance

    Preparation15 minutes
    Cooking45 minutes
    Total time60 minutes
    Servings6
    DifficultyEasy

    Times are estimates and may vary with your equipment and experience. Adjust seasoning to taste and follow safe food-handling practices.

    Frequently asked questions

    Which carrots work best?

    Fresh, sweet carrots with a firm texture work well.

    Can I reduce the sugar?

    Yes. Add less sugar and adjust after tasting.

    Can gajar halwa be served cold?

    Yes. It can be enjoyed warm or chilled.

    Choosing and preparing carrots

    Fresh carrots with a firm texture and naturally sweet flavour are ideal. Wash them thoroughly, peel if needed and remove the ends. Grate them using the larger holes of a box grater so they retain some texture during cooking. Very finely grated carrots soften quickly but can make the finished halwa less textured.

    Carrots contain moisture, and the amount varies by season and freshness. The cooking time is therefore approximate. Use a wide, heavy pan so milk can evaporate steadily. Stir often, especially as the mixture thickens, because the milk solids and natural sugars can catch on the bottom.

    Cooking the milk down

    Add the grated carrots and milk to the pan and bring it to a gentle simmer. Avoid a rapid boil that may cause milk to foam over. Stir and scrape the base regularly. As the milk reduces, the carrots soften and take on a creamy texture.

    Add sugar after the carrots have softened and much of the milk has reduced. Sugar draws moisture from the carrots, so the mixture may become looser again. Continue cooking until the excess liquid evaporates. Add ghee toward the end and stir until the halwa looks glossy and cohesive.

    Garnish and flavour choices

    Green cardamom gives the dessert a warm fragrance. Lightly crush the pods and remove large husks if you prefer a smoother bite. Almonds and pistachios add crunch, but they are optional. Chop nuts finely and check for allergies before serving to guests.

    A small amount of ghee helps round out the flavour. Avoid adding too much at once, because the dessert can become greasy. Taste before adding the full amount of sugar; carrots vary in sweetness, and the final dessert should suit your preference.

    Troubleshooting carrot halwa

    If the halwa looks watery, continue cooking gently until the liquid reduces. Do not add extra semolina or flour to thicken it; that changes the traditional texture. Stir more frequently as it thickens.

    If the mixture sticks, lower the heat and scrape the bottom with a flat wooden spoon. A heavy-bottomed pan helps distribute heat. If the carrots are still firm but the milk has reduced, add a small splash of milk and continue cooking.

    If the halwa tastes too sweet, serve it with unsweetened nuts or plain accompaniments next time and reduce the sugar in the next batch. It is difficult to remove sweetness once it has dissolved.

    Serving and making ahead

    Gajar ka halwa can be served warm as a dessert after a meal or chilled for a firmer texture. A small portion is often enough because it is rich. Garnish just before serving so the nuts retain some crunch.

    You can prepare it ahead and refrigerate it in a covered container. Reheat gently in a pan or microwave, stirring between intervals. Add a small splash of milk if it has become too thick. Refrigerate leftovers promptly and use them within three to four days.

    Extra cooking guidance and practical tips

    Grating the carrots by hand takes a little time, but it gives you control over the texture. A food processor can speed up the work; use a grating attachment rather than blending the carrots into a puree. A puree releases moisture differently and may produce a softer, less textured dessert.

    Do not rush the reduction stage. Milk needs time to simmer and combine with the carrots. Keep the heat moderate and stir the bottom and corners of the pan, where milk solids can collect. A wide pan helps moisture escape, but it also means you should stir more frequently as the mixture thickens.

    Cardamom is fragrant, so a small quantity is usually enough. If you prefer a stronger aroma, add a little more near the end rather than increasing it dramatically at the beginning. Nuts can be lightly toasted separately to bring out their flavour before garnishing.

    The colour of gajar ka halwa depends on the carrots used. Some carrots are naturally deeper orange or red, while others are paler. Do not add artificial colour just to make the dessert look brighter; the natural colour is part of its homemade character.

    Serve the halwa in small bowls because it is a rich dessert. A few chopped nuts on top provide texture. If serving guests, keep the nuts separate until the last moment so people with allergies can avoid them.

    Prepare the carrots and measure the other ingredients before starting. Once the milk begins reducing, the pan needs regular attention. Planning ahead makes the process easier and prevents leaving the stove unattended.

    More helpful tips for home cooks

    Some cooks prefer to cook the carrots in milk first and add sugar later, while others use a little ghee to sauté the carrots before adding milk. Both approaches can work. This recipe uses milk as the main cooking liquid and ghee near the end, keeping the process straightforward and allowing the carrot flavour to remain clear.

    If you want a slightly richer dessert, you can replace a small portion of the milk with evaporated milk, but it will reduce differently and may need closer stirring. Avoid adding sweetened condensed milk without reducing the sugar, because it can make the dessert excessively sweet.

    Keep a small bowl of water nearby for rinsing the spoon if sticky halwa begins to build up on it. Do not add water directly to the dessert unless needed to prevent scorching; extra water extends the reduction time and can dilute the flavour.

    Use a spatula that reaches the corners of the pan. Scraping the base and sides regularly prevents milk solids from browning too much. A little caramelisation can add depth, but burnt patches create a bitter taste that is difficult to correct.

    Allow the halwa to cool slightly before transferring it to a storage container. Use a clean, dry spoon when serving from the container. This reduces the chance of introducing moisture or contaminants and helps leftovers keep their quality.

    If you are preparing the dessert for a celebration, make it a day ahead and reheat gently. Add the nuts after reheating, then garnish with a few extra chopped pistachios. This gives the dish a freshly finished appearance without needing to cook it at the last minute.

    Final preparation notes

    If you want to prepare a larger batch, use a wider pan and stir more frequently. Doubling the ingredients in a small pot can make the milk take much longer to reduce and increases the chance of uneven cooking. It is often better to cook two batches than to overcrowd the pan.

    A spoonful of chopped nuts can be mixed through the halwa, but reserve most for the garnish so their texture remains noticeable. If serving a group, label the dessert clearly if it contains nuts and offer a nut-free portion when needed.

    Helpful details for consistent results

    For a smoother finish, you can mash a small portion of the cooked carrots against the side of the pan and mix them back in. This thickens the dessert naturally while leaving most of the grated carrot texture intact. Avoid blending the entire batch unless you specifically want a puree-like consistency.

    When buying carrots, choose firm ones without soft spots or a dry, shrivelled surface. Fresh carrots are easier to grate and usually have a cleaner flavour. Remove any damaged sections before cooking.more detailChicken Biryani Recipe – Fragrant Pakistani Chicken Rice

    More serving and preparation advice

    When the halwa is nearly ready, scrape the sides of the pan and fold the mixture back into the centre. This prevents the thin layer around the edges from drying out while the centre remains moist. Keep the heat low and stir until the texture is consistent throughout.

    The dessert should look moist and glossy rather than runny. If a spoon dragged through the pan leaves a path that slowly closes, the mixture is usually thick enough for serving warm. It will become firmer after cooling, so do not cook it until completely dry.

    If you are making this for a family with different sweetness preferences, serve a small bowl of extra chopped nuts or plain cream separately rather than increasing sugar in the whole pan. This lets each person adjust their serving.

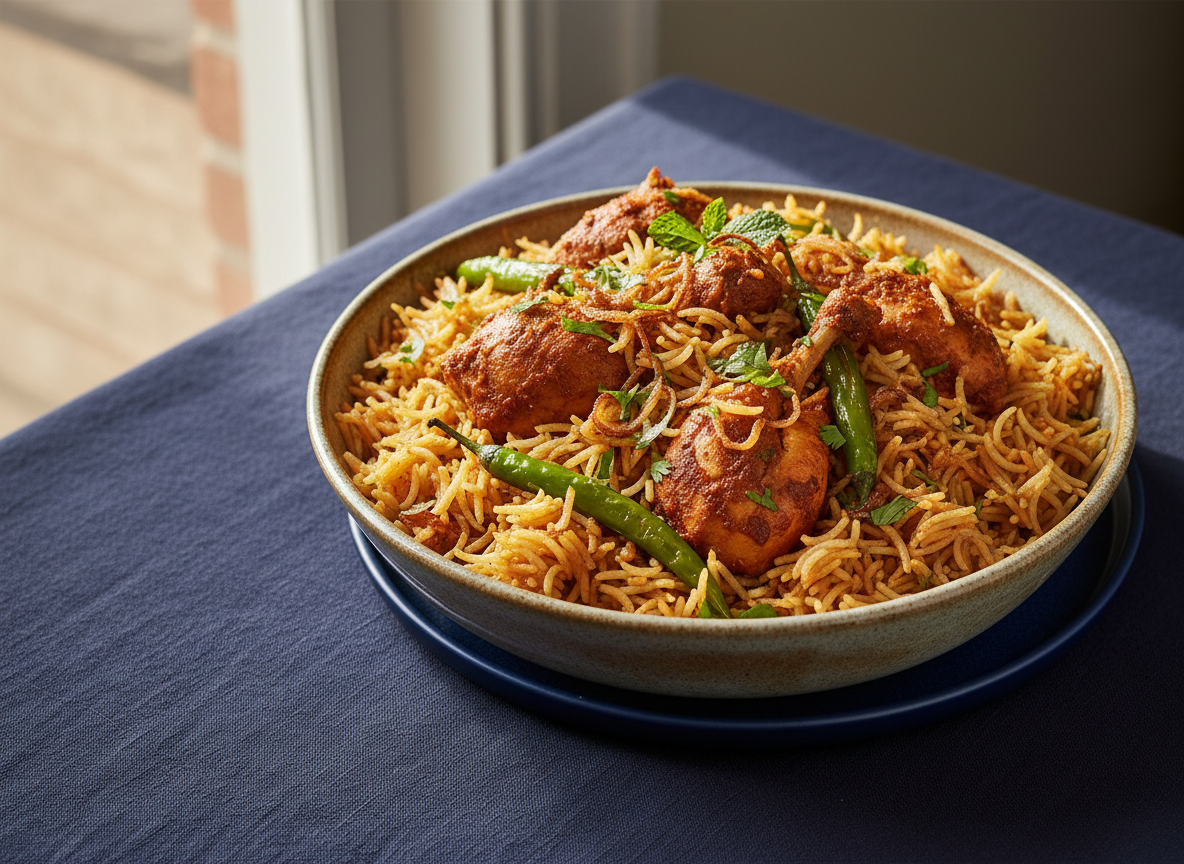
  • Chicken Biryani Recipe – Fragrant Pakistani Chicken Rice

    Chicken Biryani Recipe – Fragrant Pakistani Chicken Rice

    A home-style Chicken Biryani Recipe with a spiced masala, partly cooked rice and a final gentle steam. Prepare the components before layering.

    Ingredients

    • 750 g chicken pieces
    • 2 cups basmati rice, rinsed and soaked 20 minutes
    • 2 onions, thinly sliced
    • 2 tomatoes, chopped
    • ½ cup plain yogurt
    • 2 tbsp ginger-garlic paste
    • Biryani masala or a mix of cumin, coriander, chilli and garam masala
    • Mint, coriander, green chillies and lemon
    • Oil or ghee, salt and a pinch of food colour (optional)

    Method

    1. Fry onions until golden. Remove some for garnish.
    2. Add chicken, ginger-garlic paste and spices; cook until fragrant.
    3. Add tomatoes and yogurt. Simmer until chicken is cooked and masala is thick.
    4. Boil rice in salted water until about 70–80% cooked; drain.
    5. Layer rice over chicken masala. Add herbs, fried onion and lemon.
    6. Cover tightly and steam on very low heat until rice is tender and flavours combine.
    7. Rest briefly, then fluff gently and serve.

    Cooking time varies by rice and pot. Ensure chicken is fully cooked before serving.

    Chicken Biryani at a glance

    Preparation25 minutes
    Cooking65 minutes
    Total time90 minutes
    Servings6
    DifficultyMedium

    Times are estimates and may vary with your equipment and experience. Adjust seasoning to taste and follow safe food-handling practices.

    Frequently asked questions

    Why should rice be partly cooked first?

    It finishes steaming with the chicken masala so the grains do not overcook.

    Can I make biryani less spicy?

    Reduce green chillies and chilli powder to suit your taste.

    How should I store leftovers?

    Cool promptly, refrigerate in a covered container and reheat thoroughly.

    Understanding the rice and masala

    Basmati rice is valued for its long grains and aroma. Rinse it several times until the water is less cloudy, then soak it for around 20 minutes. This helps the grains cook more evenly. Do not soak for an unusually long time unless the rice package recommends it, because very soft grains can break during boiling and layering.

    The chicken masala should be flavourful and slightly moist, not watery. The rice will take on aroma from the masala during the final steam. If the masala is too thin, the lower rice layer can become soggy; if it is too dry, the flavours may not spread evenly. Reduce excess liquid before layering.

    Layering and steaming tips

    Spread the chicken masala evenly across the bottom of a heavy pot, then add the drained parboiled rice in a loose layer. Sprinkle herbs, fried onion and lemon over the rice. If using food colour, dissolve a tiny amount according to its package directions and drizzle sparingly; it is optional and does not create the flavour of biryani.

    Seal the pot with a tight-fitting lid. If the lid is loose, place a clean kitchen towel between the pot and lid, keeping it safely away from the flame. Steam on very low heat. A heat diffuser or tawa beneath the pot can help prevent the bottom layer from scorching.

    Choosing and balancing spices

    Biryani masala blends differ in strength, salt and chilli level. If using a packaged blend, check its label before adding extra salt or chilli. Whole spices such as cardamom, cinnamon, cloves and bay leaf can add aroma, but use them in moderation so they do not overpower the chicken.

    Yogurt adds body and a gentle tang to the masala. Use plain unsweetened yogurt and stir it in over moderate heat. If it is very cold, allow it to lose some chill before adding. Stir continuously at first so it blends smoothly.

    Troubleshooting biryani

    If the rice is still firm after steaming, sprinkle a little hot water over it, cover tightly and continue on very low heat for a few minutes. Avoid stirring repeatedly because that can break the grains.

    If the rice becomes mushy, it may have been boiled too far before layering or steamed with too much liquid. Next time drain the rice when it is still slightly firm in the centre and make sure the chicken masala is not watery.

    If the bottom catches, lower the heat and use a heavy pot or heat diffuser. Do not scrape burnt rice into the rest of the dish; carefully transfer the unburnt biryani to a serving dish.

    Serving and planning ahead

    Serve biryani with plain raita, sliced cucumber, onion and tomato salad or a simple mint chutney. Since the rice and chicken are richly seasoned, fresh and cooling sides are usually enough. Lemon wedges can be offered separately.

    You can prepare the chicken masala earlier and refrigerate it promptly, then cook the rice and assemble the biryani closer to mealtime. Keep the cooked masala chilled and reheat it until hot before layering. Do not leave cooked chicken at room temperature while preparing the rice.
    for more infoTawa Seekh Kebab Recipe – Easy Stovetop Kebabs

    Extra cooking guidance and practical tips

    Use a pot with a thick base and a lid that fits securely. A thin pot can develop hot spots and scorch the rice during dum. If your cookware is light, place a flat tawa beneath it to diffuse heat. Keep the flame very low once the pot is covered, because the goal is gentle steam rather than vigorous frying.

    Allow the biryani to rest for several minutes after switching off the heat. This helps steam settle and makes it easier to lift the rice without breaking the grains. Use a wide spoon and lift from the side rather than stirring the entire pot aggressively.

    Fried onions add sweetness and depth. Slice them evenly so they brown at a similar rate, and remove them from the oil when they are golden rather than very dark. They continue to darken slightly after being removed. Drain on a plate and scatter over the layers.

    Mint and coriander contribute freshness, while lemon gives a bright finish. Use fresh herbs and distribute them in a thin layer rather than adding a large clump in one place. If you do not enjoy mint, reduce it and use more coriander.

    Make the dish your own by adjusting the chilli and whole spices, but keep the rice-to-liquid balance under control. A good biryani has separate grains with flavourful chicken underneath. Careful parboiling and gentle dum are more important than adding many extra spices.

    Before serving, check that the chicken pieces are hot and cooked through. If you have prepared the masala ahead, cool it promptly and refrigerate it rather than leaving it on the counter. Reheat thoroughly before layering with freshly parboiled rice.

    More helpful tips for home cooks

    Rice parboiling is one of the most important stages. Bring a large pot of water to a boil and season it lightly with salt. Add the soaked, drained rice and cook until the grains are elongated but still firm in the middle. The exact time varies by rice brand, so begin checking early. Drain immediately when the rice reaches this stage.

    Use a slotted spoon to handle the rice gently if you need to move it into the layering pot. Avoid pressing down on the grains. They will soften further during steaming, so slightly undercooked rice at this stage is preferable to rice that is already fully soft.

    Chicken pieces should be similar in size. Smaller pieces cook more quickly, while large bone-in pieces need longer. If your pieces vary widely, remove the smaller cooked pieces temporarily and return them when layering, or cut the chicken into more even portions before cooking.

    Fried onions can be prepared in advance, but store them only after they have cooled completely. If covered while warm, trapped steam can soften them. Keep them in a dry airtight container for a short period and add them between layers or as a garnish.

    Do not stir the biryani like a curry after the dum stage. The rice grains are delicate. Lift portions gently from the side of the pot so you can serve both rice and chicken without crushing the layers.

    To make a balanced plate, pair the biryani with a simple raita made from plain yogurt, cucumber and a little salt. A fresh salad with onion, tomato and lemon adds crunch. These sides provide contrast without competing with the aromatic rice.

    Final preparation notes

    For a more fragrant finish, use fresh mint and coriander rather than dried herbs. Wash them, dry them well and chop shortly before layering. Wet herbs can add unwanted moisture to the rice, so shake off excess water and pat them dry before use.

    If the chicken masala tastes too sharp from the tomatoes, allow it to simmer until the raw tomato flavour softens. A little yogurt can round out the sauce, but the key is to cook it gently and reduce excess moisture before adding the rice.

    Helpful details for consistent results

    If you like a stronger aroma, add whole spices to the oil before frying the onions, then remove any large pieces before serving if you prefer. Cinnamon, cloves and cardamom can be potent, so use them lightly and let them infuse the oil without burning.

    A little saffron steeped in warm milk can be drizzled over the rice before dum, but it is optional. The main biryani flavour should come from the chicken masala, onions, herbs and correctly cooked rice rather than colour alone.

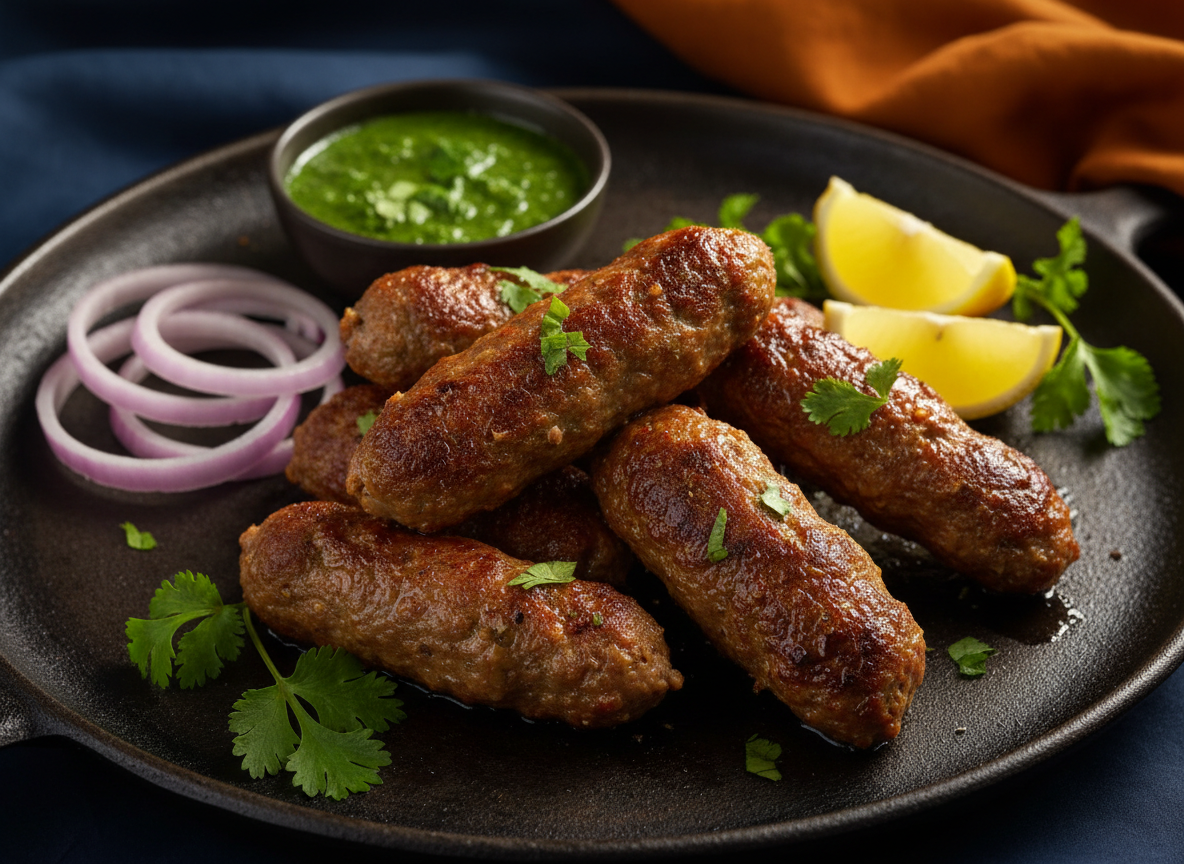
  • Tawa Seekh Kebab Recipe – Easy Stovetop Kebabs

    Tawa Seekh Kebab Recipe – Easy Stovetop Kebabs

    Tawa Seekh Kebab Recipe bring the flavour of spiced minced-meat kebabs to an ordinary home kitchen without requiring a barbecue or outdoor grill. The mixture is seasoned with onion, ginger-garlic, herbs and warm spices, shaped into short kebabs and cooked on a hot, lightly oiled tawa. Chilling the mixture and controlling its moisture help the kebabs keep their shape.

    This guide explains the ingredients, preparation and cooking method in a practical order. Read through the method once before starting, measure the ingredients and prepare your cooking area. Small details such as dough texture, moisture level and heat control make a noticeable difference to the final result.

    The quantities are a starting point for a home kitchen. Ingredient sizes and moisture vary, so use the visual and texture cues in the instructions. Adjust seasoning gradually rather than adding a large amount at once.

    If you are cooking for guests, prepare the ingredients in advance and cook the dish close to serving time. Freshly cooked bread and kebabs are at their best when served warm; halwa can be held briefly and reheated gently.

    Recipe at a glance

    Preparation: 20 minutes plus chilling. Cooking: 10–15 minutes. Servings: 4. Method: stovetop. Difficulty: easy to medium. Times are estimates and depend on equipment, ingredient temperature and portion size.

    Ingredients

    • 500 g minced beef or chicken
    • 1 small onion, finely grated and squeezed dry
    • 1 tbsp ginger-garlic paste
    • 1 tsp cumin powder
    • 1 tsp coriander powder
    • ½ tsp chilli flakes
    • Salt and black pepper to taste
    • 2 tbsp chopped coriander and mint
    • 1 tbsp gram flour, lightly toasted
    • Oil for the pan
    • Lemon wedges and chutney to serve

    Choose fresh ingredients and measure them before cooking. Keep salt and chilli adjustable to your taste. Use clean utensils and separate equipment for raw meat where applicable. If an ingredient is optional, leave it out rather than replacing it with a large amount of another seasoning.

    The quality and condition of the main ingredient affect the result. Potatoes should be cooked until tender; mince should be kept chilled until mixing; flour should be fresh and stored dry. Preparing ingredients consistently helps them cook evenly.

    Equipment and preparation

    Use a stable, clean cooking surface and a pan suited to the quantity. A heavy pan distributes heat more evenly and is less likely to develop hot spots. Keep a plate ready for cooked portions and use tongs or a spatula to turn food safely.

    Complete the chopping, measuring and mixing before heating the pan. This is especially helpful when frying or cooking over a hot tawa, because the food may need attention throughout the process. Keep children away from hot oil and the stove.

    Step-by-step method

    1. Place the mince in a clean mixing bowl. If it contains excess liquid, drain it so the mixture is not loose.
    2. Add the squeezed grated onion, ginger-garlic paste, cumin, coriander, chilli flakes, salt, pepper, herbs and toasted gram flour.
    3. Mix thoroughly until the seasonings are evenly distributed and the mixture begins to hold together. Avoid adding extra water.
    4. Cover and refrigerate for 20–30 minutes. Chilling firms the mixture and makes shaping easier.
    5. Lightly oil your hands. Divide the mixture into equal portions and shape around metal skewers, or form small oval kebabs if you do not have skewers.
    6. Heat a tawa over medium heat and brush it with a little oil. Place the kebabs with space between them so they brown instead of steaming.
    7. Turn carefully as the underside browns. Continue cooking until the kebabs are evenly browned and cooked through in the centre. Use a food thermometer: minced beef should reach 71°C (160°F), while minced chicken should reach 74°C (165°F).
    8. Rest briefly and serve with lemon, chutney, sliced onion and warm naan or roti.

    Texture, flavour and heat control

    Squeezing moisture from the grated onion is important. A wet mixture can slide off skewers or break when turned. Toasted gram flour helps bind the mince, but use only the stated small amount so the kebabs do not become dense.

    Heat control matters as much as the ingredient list. If the surface browns too quickly, lower the heat so the centre has time to cook. If food is pale and releasing moisture, the pan may be crowded or not hot enough. Work in batches when necessary and allow the pan to recover its heat between batches.

    Taste and adjust only when it is safe and appropriate to do so. A little lemon, fresh coriander or chutney at the table can brighten the dish without changing the main cooking process. Avoid over-seasoning early, because flavours become more concentrated as moisture evaporates.

    Common mistakes to avoid

    One common mistake is rushing preparation. Unevenly cut ingredients or poorly mixed seasoning can lead to inconsistent results. Take a moment to make portions similar in size so they cook at roughly the same rate.

    Another mistake is using excessive heat from beginning to end. High heat may be useful for starting a cook, but many dishes need moderate heat to finish properly. Watch the food rather than relying only on the stove setting.

    Adding too much liquid can affect texture. Follow the quantities and add extra water only when the method calls for it. If a mixture becomes too wet, pause and correct the texture before shaping or cooking rather than trying to fix it in the pan.

    Variations and substitutions

    Use minced chicken for a lighter-tasting kebab, or beef for a richer flavour. Adjust chilli flakes to taste. If you do not have skewers, shape the mixture into flat oval patties so they cook evenly on the tawa.

    You can adjust the seasoning to match the meal and the people eating it. Keep the core method the same while changing only one or two elements at a time. This makes it easier to understand how a substitution changes the taste or texture.

    For a larger gathering, cook in batches rather than doubling everything in one crowded pan. If scaling a recipe, check that the pan is large enough and that the centre of each portion cooks safely.

    Serving suggestions

    Serve the dish with simple accompaniments that balance its flavour. Fresh salad, plain yogurt, chutney or lemon can add freshness. Choose one or two sides rather than making the plate too crowded.

    For a family meal, place accompaniments in separate bowls so everyone can choose what they enjoy. Keep hot foods hot and chilled sides refrigerated until serving.

    If serving as part of a larger spread, prepare the sides first and cook the main item last. This helps the hot food reach the table at its best texture.

    Storage and food safety

    Cool cooked food promptly and store it in a covered container in the refrigerator. Do not leave perishable food at room temperature for more than two hours, or one hour in very hot conditions above 32°C (90°F). Refrigerate leftovers promptly and use them within three to four days.

    Reheat leftovers until steaming hot throughout. For meat dishes, use a food thermometer to check safe doneness and reheating temperatures. Do not repeatedly cool and reheat the same batch; reheat only the portion you intend to eat.

    If freezing, use an airtight freezer-safe container and label it with the date. Thaw in the refrigerator rather than on the counter. Texture can change after freezing, so stir or reshape gently as appropriate when reheating.

    Frequently asked questions

    Why do my kebabs fall apart? The mixture may be too wet, insufficiently mixed or not chilled. Squeeze the onion dry and chill before shaping.

    Can I make them without skewers? Yes. Shape into short, even oval patties and turn gently with a spatula.

    How do I know minced meat is cooked? Use a food thermometer in the centre. Beef mince should reach 71°C (160°F), and chicken mince 74°C (165°F).

    Can I prepare the mixture in advance? You can mix and refrigerate it covered, keeping it cold and cooking it within a safe timeframe.

    What should I serve with seekh kebabs? Naan, roti, salad, lemon and mint or coriander chutney are good options.

    Final thoughts

    This recipe is designed to be manageable with everyday kitchen equipment and familiar ingredients. Take time to prepare the components, watch the texture as it cooks and adjust the seasoning to suit your household. Once you have made it once, you will know which parts can be prepared ahead and which are best done just before serving.

    For more home-cooking inspiration, explore the other recipes on KitchenVibez and build a meal plan around the ingredients you already have.for more infoAloo Paratha Recipe – Crispy, Stuffed Potato Paratha

    Extra cooking guidance and practical tips

    The mince should have enough structure to hold together but should not be kneaded into a paste. Mix until the seasonings are evenly distributed and the mixture feels cohesive. If using very lean mince, a small amount of fat can help keep the cooked kebabs moist, but avoid adding extra liquid.

    Shape kebabs to a similar thickness. Thin ends cook faster and may dry before the centre is ready, so gently even out the shape. If a kebab cracks while shaping, smooth it with damp hands and press the mixture together without compacting it too firmly.

    Do not move the kebabs constantly when they first touch the hot tawa. Let the surface set and brown before turning. Use a thin spatula or tongs and turn carefully. If the kebabs stick, give them a little more time; a browned surface often releases more easily.

    Cook in batches if the pan is small. Crowding lowers the surface temperature and releases moisture, which can make the kebabs steam rather than brown. Wipe away excess burnt residue between batches and add a light film of fresh oil.

    Keep raw mince and cooked kebabs on separate plates. Never return cooked food to a plate that held raw meat unless it has been thoroughly washed. Clean hands, boards and utensils after handling raw mince, and check safe internal temperature before serving.

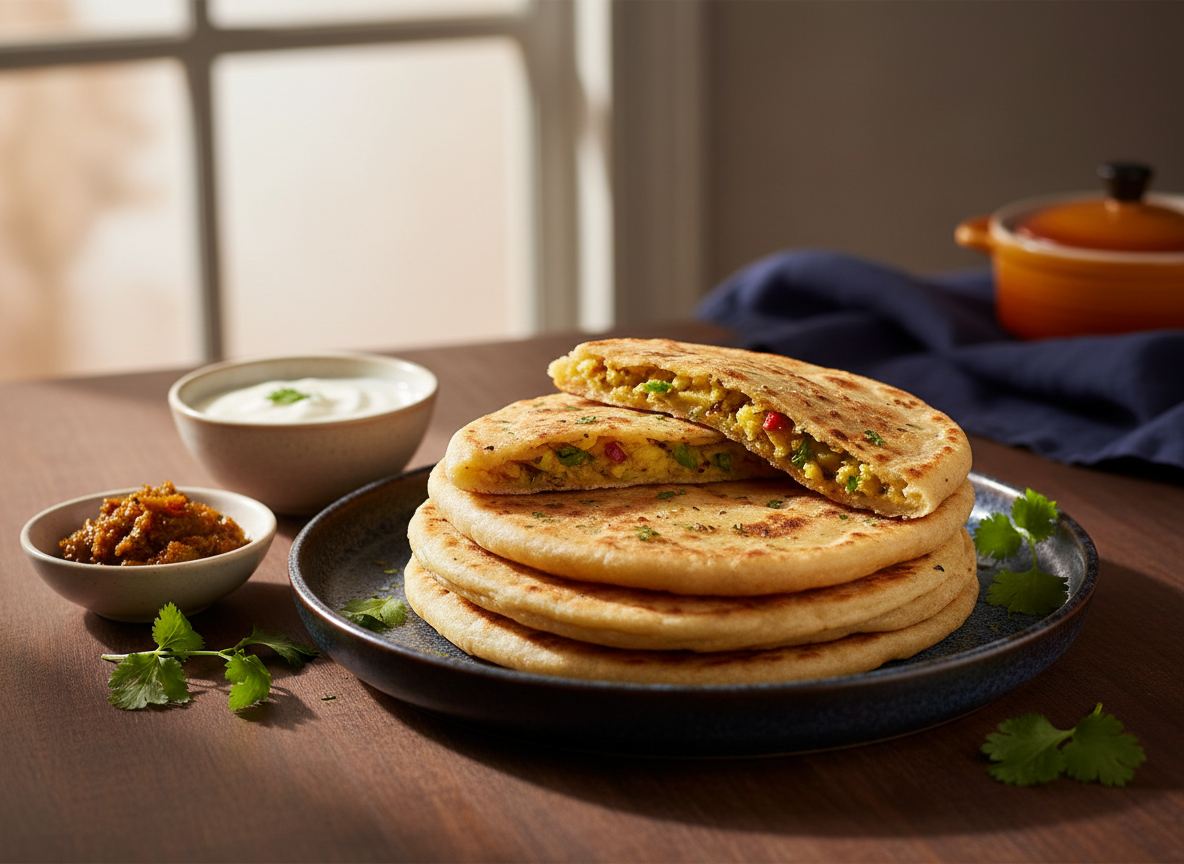
  • Aloo Paratha Recipe – Crispy, Stuffed Potato Paratha

    Aloo Paratha Recipe – Crispy, Stuffed Potato Paratha

    Aloo Paratha Recipe is a comforting stuffed flatbread made with whole-wheat dough and a seasoned potato filling. It is popular for breakfast, lunch boxes and simple dinners because it uses inexpensive ingredients and can be served with yogurt, pickle or chutney. A good paratha has a soft centre, a well-seasoned filling and a lightly crisp surface with golden spots.

    This guide explains the ingredients, preparation and cooking method in a practical order. Read through the method once before starting, measure the ingredients and prepare your cooking area. Small details such as dough texture, moisture level and heat control make a noticeable difference to the final result.

    The quantities are a starting point for a home kitchen. Ingredient sizes and moisture vary, so use the visual and texture cues in the instructions. Adjust seasoning gradually rather than adding a large amount at once.

    If you are cooking for guests, prepare the ingredients in advance and cook the dish close to serving time. Freshly cooked bread and kebabs are at their best when served warm; halwa can be held briefly and reheated gently.

    Recipe at a glance

    Preparation: 15 minutes. Cooking: 20 minutes. Servings: 3–4. Method: stovetop. Difficulty: easy to medium. Times are estimates and depend on equipment, ingredient temperature and portion size.

    Ingredients

    • 2 cups whole-wheat flour
    • Water as needed and a pinch of salt for the dough
    • 2 medium potatoes, boiled, peeled and mashed
    • 1 green chilli, finely chopped
    • 2 tbsp chopped coriander
    • ½ tsp cumin
    • ½ tsp coriander powder
    • Salt to taste
    • Ghee or oil for cooking

    Choose fresh ingredients and measure them before cooking. Keep salt and chilli adjustable to your taste. Use clean utensils and separate equipment for raw meat where applicable. If an ingredient is optional, leave it out rather than replacing it with a large amount of another seasoning.

    The quality and condition of the main ingredient affect the result. Potatoes should be cooked until tender; mince should be kept chilled until mixing; flour should be fresh and stored dry. Preparing ingredients consistently helps them cook evenly.

    Equipment and preparation

    Use a stable, clean cooking surface and a pan suited to the quantity. A heavy pan distributes heat more evenly and is less likely to develop hot spots. Keep a plate ready for cooked portions and use tongs or a spatula to turn food safely.

    Complete the chopping, measuring and mixing before heating the pan. This is especially helpful when frying or cooking over a hot tawa, because the food may need attention throughout the process. Keep children away from hot oil and the stove.

    Step-by-step method

    1. Place the flour and salt in a bowl. Add water gradually and mix until a dough forms. Knead until smooth and soft, but not sticky.
    2. Cover the dough and rest it for about 15 minutes. Resting allows the flour to absorb water and makes rolling easier.
    3. Mash the boiled potatoes thoroughly. Remove large lumps because they can tear the dough while rolling.
    4. Mix the potato with green chilli, coriander, cumin, coriander powder and salt. Taste a tiny amount of the filling and adjust the seasoning before stuffing.
    5. Divide the dough into equal balls and the filling into portions. Flatten one dough ball, place filling in the centre and bring the edges together to seal.
    6. Dust lightly with flour and roll gently into a round paratha. Use even pressure and turn the dough as you roll so the filling spreads without breaking through.
    7. Heat a tawa over medium heat. Place the paratha on it and cook until small bubbles appear. Flip, brush with a little ghee or oil, then turn again and cook until both sides have golden brown spots and the dough is cooked through.

    Texture, flavour and heat control

    The filling should be cool and fairly dry before stuffing. If the potatoes are wet or lumpy, the dough may tear. Roll gently, dusting only as much flour as needed.

    Heat control matters as much as the ingredient list. If the surface browns too quickly, lower the heat so the centre has time to cook. If food is pale and releasing moisture, the pan may be crowded or not hot enough. Work in batches when necessary and allow the pan to recover its heat between batches.

    Taste and adjust only when it is safe and appropriate to do so. A little lemon, fresh coriander or chutney at the table can brighten the dish without changing the main cooking process. Avoid over-seasoning early, because flavours become more concentrated as moisture evaporates.

    Common mistakes to avoid

    One common mistake is rushing preparation. Unevenly cut ingredients or poorly mixed seasoning can lead to inconsistent results. Take a moment to make portions similar in size so they cook at roughly the same rate.

    Another mistake is using excessive heat from beginning to end. High heat may be useful for starting a cook, but many dishes need moderate heat to finish properly. Watch the food rather than relying only on the stove setting.

    Adding too much liquid can affect texture. Follow the quantities and add extra water only when the method calls for it. If a mixture becomes too wet, pause and correct the texture before shaping or cooking rather than trying to fix it in the pan.

    Variations and substitutions

    Add a pinch of chilli flakes, amchur or roasted cumin if you enjoy a tangier filling. For children or anyone who prefers mild food, leave out the green chilli and use coriander and cumin for flavour.

    You can adjust the seasoning to match the meal and the people eating it. Keep the core method the same while changing only one or two elements at a time. This makes it easier to understand how a substitution changes the taste or texture.

    For a larger gathering, cook in batches rather than doubling everything in one crowded pan. If scaling a recipe, check that the pan is large enough and that the centre of each portion cooks safely.

    Serving suggestions

    Serve the dish with simple accompaniments that balance its flavour. Fresh salad, plain yogurt, chutney or lemon can add freshness. Choose one or two sides rather than making the plate too crowded.

    For a family meal, place accompaniments in separate bowls so everyone can choose what they enjoy. Keep hot foods hot and chilled sides refrigerated until serving.

    If serving as part of a larger spread, prepare the sides first and cook the main item last. This helps the hot food reach the table at its best texture.

    Storage and food safety

    Cool cooked food promptly and store it in a covered container in the refrigerator. Do not leave perishable food at room temperature for more than two hours, or one hour in very hot conditions above 32°C (90°F). Refrigerate leftovers promptly and use them within three to four days.

    Reheat leftovers until steaming hot throughout. For meat dishes, use a food thermometer to check safe doneness and reheating temperatures. Do not repeatedly cool and reheat the same batch; reheat only the portion you intend to eat.

    If freezing, use an airtight freezer-safe container and label it with the date. Thaw in the refrigerator rather than on the counter. Texture can change after freezing, so stir or reshape gently as appropriate when reheating.

    Frequently asked questions

    How do I stop the paratha from tearing? Use a soft but not sticky dough, cool and dry filling, and gentle rolling pressure.

    Can I prepare the filling ahead? Yes. Refrigerate it in a covered container and use it within a safe period; bring it out shortly before shaping.

    Can I freeze uncooked parathas? Layer rolled parathas with baking paper and freeze flat in a suitable container. Cook from frozen over moderate heat, allowing extra time.

    Why is my paratha hard? The dough may be too firm, the tawa too hot or the paratha cooked for too long. Adjust the dough and heat.

    What goes well with aloo paratha? Yogurt, pickle, mint chutney or a cup of tea make simple accompaniments.

    Final thoughts

    This recipe is designed to be manageable with everyday kitchen equipment and familiar ingredients. Take time to prepare the components, watch the texture as it cooks and adjust the seasoning to suit your household. Once you have made it once, you will know which parts can be prepared ahead and which are best done just before serving.

    For more home-cooking inspiration, explore the other recipes on KitchenVibez and build a meal plan around the ingredients you already have.

    Extra cooking guidance and practical tips

    Choose potatoes that mash smoothly after boiling. Drain them well and allow excess steam to escape before mashing. If the potato filling is wet, it may push through the dough when rolled. A dry, evenly seasoned filling is easier to portion and produces a more consistent paratha.

    Do not overfill the dough. A moderate amount of filling leaves enough dough around it to seal securely. Pinch the gathered edges together and remove any thick excess dough before rolling. This prevents a dense knot in the middle and helps the paratha cook evenly.

    Use a medium-hot tawa rather than an extremely hot one. If the surface browns before the inside cooks, reduce the heat. If the paratha remains pale and dry for a long time, increase the heat slightly. Every stove behaves differently, so watch the colour and feel of the bread.

    Brush ghee or oil in a thin layer. Too much fat can make the bread heavy, while too little may leave it dry. Turn the paratha more than once if needed so both sides cook evenly and the filling becomes hot throughout.

    For meal preparation, boil the potatoes and mix the filling ahead, then refrigerate it in a covered container. Make the dough closer to cooking time for a softer result. Keep uncooked dough covered so its surface does not dry out.for more informationHalwa Puri Recipe – Pakistani Breakfast Plate

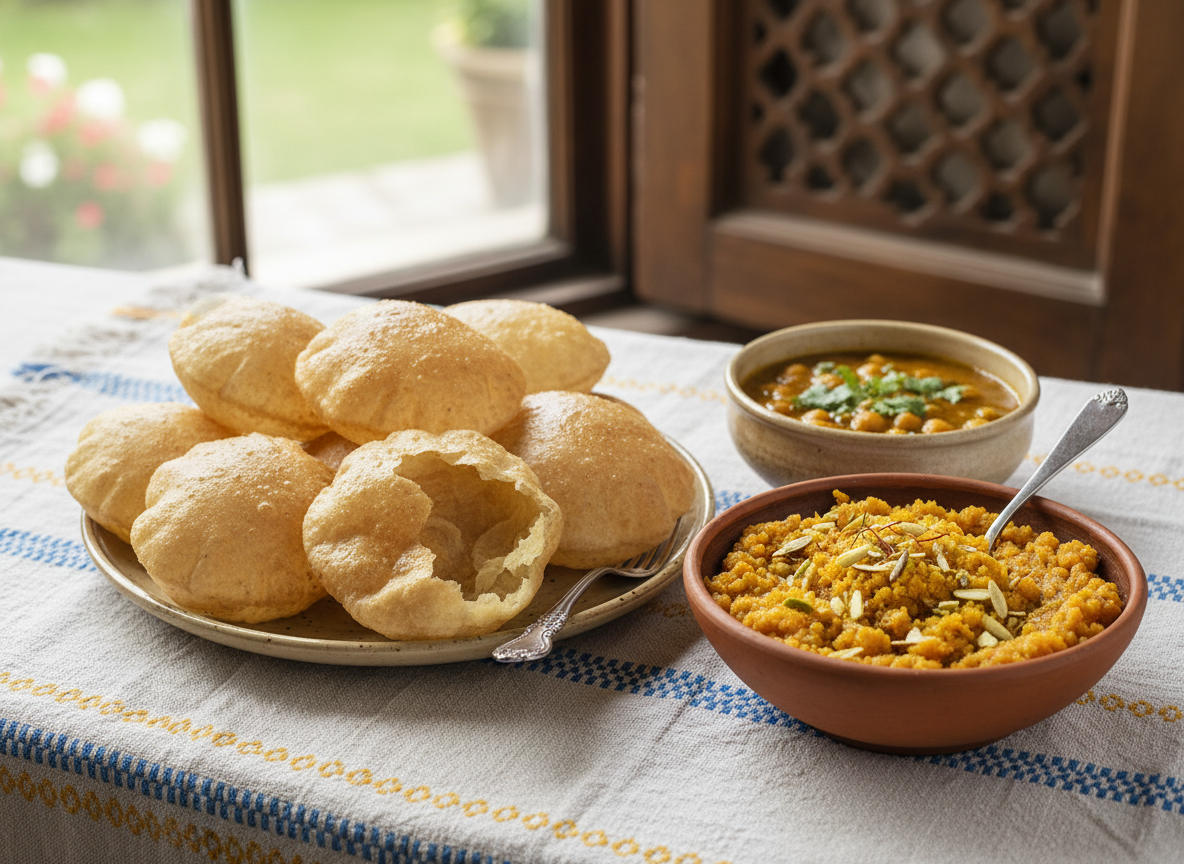
  • Halwa Puri Recipe – Pakistani Breakfast Plate

    Halwa Puri Recipe – Pakistani Breakfast Plate

    Halwa Puri Recipe is a much-loved Pakistani breakfast combination that brings together soft, sweet semolina halwa and freshly fried puri. It is often served for a leisurely weekend breakfast, family gathering or festive morning. The contrast between the rich halwa and crisp, puffed bread makes the plate feel special, while the ingredients are familiar pantry staples.

    This guide explains the ingredients, preparation and cooking method in a practical order. Read through the method once before starting, measure the ingredients and prepare your cooking area. Small details such as dough texture, moisture level and heat control make a noticeable difference to the final result.

    The quantities are a starting point for a home kitchen. Ingredient sizes and moisture vary, so use the visual and texture cues in the instructions. Adjust seasoning gradually rather than adding a large amount at once.

    If you are cooking for guests, prepare the ingredients in advance and cook the dish close to serving time. Freshly cooked bread and kebabs are at their best when served warm; halwa can be held briefly and reheated gently.

    Recipe at a glance

    Preparation: 25 minutes. Cooking: 35 minutes. Servings: 4. Method: stovetop. Difficulty: easy to medium. Times are estimates and depend on equipment, ingredient temperature and portion size.

    Ingredients

    • 1 cup semolina (suji)
    • ½ cup ghee
    • ¾ cup sugar, or adjust to taste
    • 3 cups water
    • 2 green cardamom pods
    • Chopped almonds or pistachios for garnish
    • For puri: 2 cups wheat flour or all-purpose flour, a pinch of salt, water as needed and oil for deep frying

    Choose fresh ingredients and measure them before cooking. Keep salt and chilli adjustable to your taste. Use clean utensils and separate equipment for raw meat where applicable. If an ingredient is optional, leave it out rather than replacing it with a large amount of another seasoning.

    The quality and condition of the main ingredient affect the result. Potatoes should be cooked until tender; mince should be kept chilled until mixing; flour should be fresh and stored dry. Preparing ingredients consistently helps them cook evenly.

    Equipment and preparation

    Use a stable, clean cooking surface and a pan suited to the quantity. A heavy pan distributes heat more evenly and is less likely to develop hot spots. Keep a plate ready for cooked portions and use tongs or a spatula to turn food safely.

    Complete the chopping, measuring and mixing before heating the pan. This is especially helpful when frying or cooking over a hot tawa, because the food may need attention throughout the process. Keep children away from hot oil and the stove.

    Step-by-step method

    1. Warm the water with sugar and cardamom until the sugar dissolves. Keep it warm while preparing the semolina.
    2. Heat ghee in a heavy pan. Add semolina and roast over low to medium-low heat, stirring continuously so it colours evenly without burning.
    3. When the semolina smells nutty and looks lightly golden, carefully add the warm sweetened water in a steady stream while stirring. Take care because the mixture can bubble and splash.
    4. Stir until the liquid is absorbed and the halwa thickens. Cover briefly over very low heat, then fluff and garnish with nuts.
    5. For puri, mix flour and salt. Add water gradually and knead to a firm, smooth dough. Cover and rest for about 15 minutes.
    6. Divide the dough into small balls. Roll each into an even disc, keeping the centre and edges a similar thickness.
    7. Heat oil in a deep pan. Slide in one disc carefully and press gently with a slotted spoon so it puffs. Turn once and fry until lightly golden. Drain well and repeat.

    Texture, flavour and heat control

    Roasting semolina patiently is the key to halwa with a pleasant aroma. Keep stirring and avoid using very high heat. Add the warm syrup carefully and keep stirring to prevent lumps.

    Heat control matters as much as the ingredient list. If the surface browns too quickly, lower the heat so the centre has time to cook. If food is pale and releasing moisture, the pan may be crowded or not hot enough. Work in batches when necessary and allow the pan to recover its heat between batches.

    Taste and adjust only when it is safe and appropriate to do so. A little lemon, fresh coriander or chutney at the table can brighten the dish without changing the main cooking process. Avoid over-seasoning early, because flavours become more concentrated as moisture evaporates.

    Common mistakes to avoid

    One common mistake is rushing preparation. Unevenly cut ingredients or poorly mixed seasoning can lead to inconsistent results. Take a moment to make portions similar in size so they cook at roughly the same rate.

    Another mistake is using excessive heat from beginning to end. High heat may be useful for starting a cook, but many dishes need moderate heat to finish properly. Watch the food rather than relying only on the stove setting.

    Adding too much liquid can affect texture. Follow the quantities and add extra water only when the method calls for it. If a mixture becomes too wet, pause and correct the texture before shaping or cooking rather than trying to fix it in the pan.

    Variations and substitutions

    For a lighter sweetness, reduce the sugar slightly and serve the halwa with a savoury chickpea curry. You can use a mix of wheat flour and all-purpose flour for puri, adjusting water until the dough is firm but pliable.

    You can adjust the seasoning to match the meal and the people eating it. Keep the core method the same while changing only one or two elements at a time. This makes it easier to understand how a substitution changes the taste or texture.

    For a larger gathering, cook in batches rather than doubling everything in one crowded pan. If scaling a recipe, check that the pan is large enough and that the centre of each portion cooks safely.

    Serving suggestions

    Serve the dish with simple accompaniments that balance its flavour. Fresh salad, plain yogurt, chutney or lemon can add freshness. Choose one or two sides rather than making the plate too crowded.

    For a family meal, place accompaniments in separate bowls so everyone can choose what they enjoy. Keep hot foods hot and chilled sides refrigerated until serving.

    If serving as part of a larger spread, prepare the sides first and cook the main item last. This helps the hot food reach the table at its best texture.

    Storage and food safety

    Cool cooked food promptly and store it in a covered container in the refrigerator. Do not leave perishable food at room temperature for more than two hours, or one hour in very hot conditions above 32°C (90°F). Refrigerate leftovers promptly and use them within three to four days.

    Reheat leftovers until steaming hot throughout. For meat dishes, use a food thermometer to check safe doneness and reheating temperatures. Do not repeatedly cool and reheat the same batch; reheat only the portion you intend to eat.

    If freezing, use an airtight freezer-safe container and label it with the date. Thaw in the refrigerator rather than on the counter. Texture can change after freezing, so stir or reshape gently as appropriate when reheating.

    Frequently asked questions

    Can I make halwa ahead? Yes. Prepare it earlier and reheat gently with a small splash of water if it has become firm.

    Why is my halwa lumpy? The liquid may have been added too quickly or the mixture was not stirred continuously. Add it gradually and whisk or stir firmly.

    Why do puris not puff? Uneven rolling, dough that is too soft or oil that is not hot enough can prevent puffing. Roll evenly and fry one at a time.

    Can I use less ghee? You can reduce it, although the texture and roasted flavour will be less rich.

    What can I serve with halwa puri? Chana masala, potato curry, pickle and yogurt are common accompaniments.

    Final thoughts

    This recipe is designed to be manageable with everyday kitchen equipment and familiar ingredients. Take time to prepare the components, watch the texture as it cooks and adjust the seasoning to suit your household. Once you have made it once, you will know which parts can be prepared ahead and which are best done just before serving.

    For more home-cooking inspiration, explore the other recipes on KitchenVibez and build a meal plan around the ingredients you already have.

    Extra cooking guidance and practical tips

    Make the halwa texture your guide. When the semolina is first roasted, it should smell pleasantly nutty rather than smoky. If it darkens too quickly, lower the flame and move the pan off the heat briefly. Semolina continues to toast in a hot pan, so steady stirring is more reliable than trying to roast it quickly.

    When adding the sweetened water, protect your hands and face from steam. Pour slowly and keep the spoon moving. A long-handled spoon is useful because the mixture can bubble vigorously. Once the liquid is absorbed, cover only briefly; leaving it covered for too long can make the bottom stick.

    Resting the puri dough helps it relax, but the dough should remain firm enough to roll. If it feels sticky, dust the work surface lightly rather than adding a large amount of flour. Too much dry flour can fall into the frying oil and darken it.

    Keep the rolled discs covered with a clean cloth while you fry the batch. This prevents them drying at the edges. Fry one at a time so the oil temperature does not drop sharply. If the oil smokes, lower the heat before adding another puri.

    Use a slotted spoon to drain each puri over the pan before placing it on a rack or paper towel. Stacking them tightly while very hot traps steam and softens the surface. Serve soon after frying for the best contrast with the warm halwa.for more informationChicken Karahi Recipe – Pakistani Tomato Chicken Karahi

  • Chicken Karahi Recipe – Pakistani Tomato Chicken Karahi

    Chicken Karahi Recipe – Pakistani Tomato Chicken Karahi

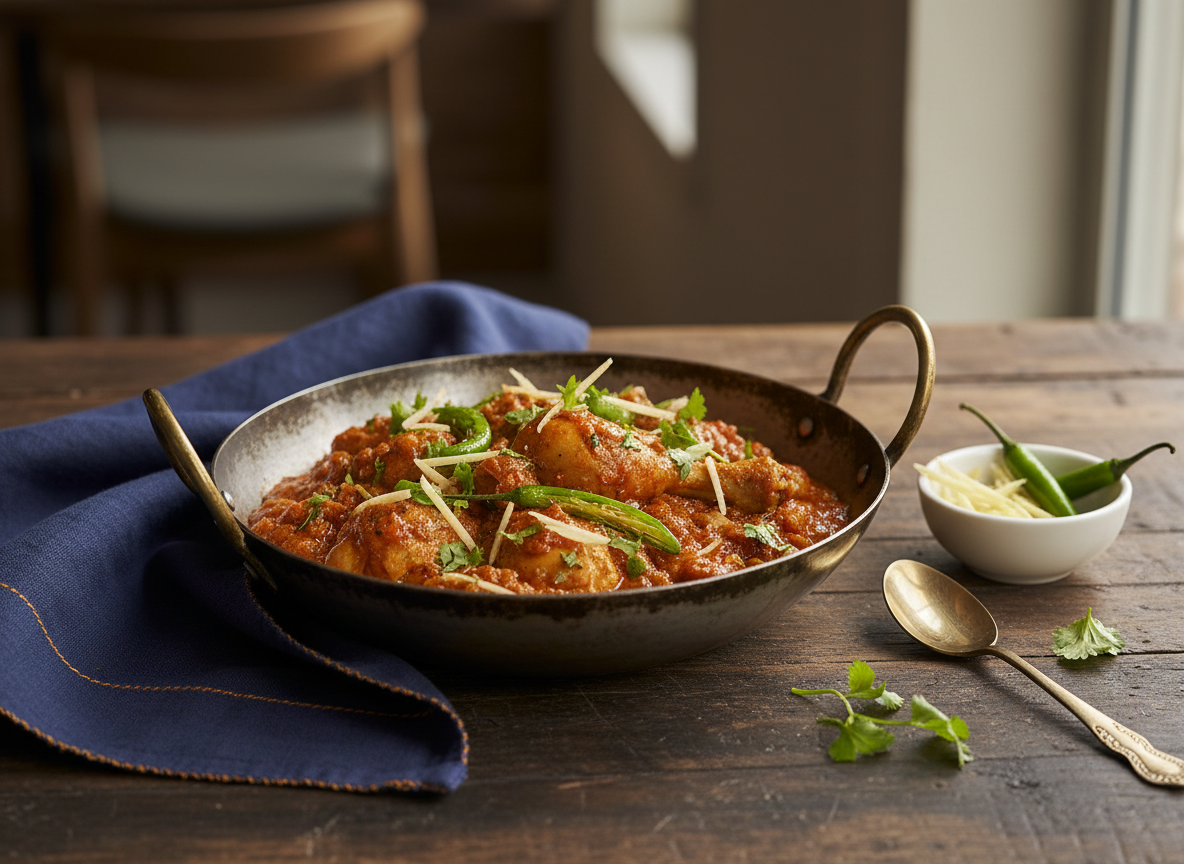
    Chicken Karahi Recipe is one of Pakistan’s best-loved home-style chicken dishes. It is known for its tomato-rich masala, fresh ginger, green chillies and lively aroma. Unlike a very thin curry, a traditional karahi is usually cooked until the tomatoes reduce and cling to the chicken. The result is a dish that tastes bold but still lets the flavour of the chicken and fresh ingredients come through.

    This recipe uses familiar ingredients and a straightforward stovetop method. It is suitable for a family meal, a weekend lunch or a dinner when you want something special without a complicated process. The heat level is flexible: use fewer green chillies and less red chilli powder for a milder karahi, or adjust them upward if your family enjoys a hotter dish.

    The quantities below are based on 750 grams of bone-in chicken and make approximately four servings. Chicken pieces vary in size, and cooking time depends on the pan, stove and cut of meat, so use the doneness checks in the method rather than relying only on the clock.

    Recipe at a glance

    Preparation time: about 15 minutes. Cooking time: about 35 minutes. Total time: approximately 50 minutes. Servings: 4. Cooking method: stovetop karahi or a wide, heavy-based pan. Difficulty: medium. The time is an estimate and may vary with your equipment and the size of the chicken pieces.

    Ingredients and why they matter

    Chicken: Use 750 grams of bone-in chicken cut into medium pieces. Bone-in pieces bring flavour to the masala and are traditional in many home-style versions. Boneless chicken can also be used, but it generally cooks faster and can become dry if left simmering for too long.

    Tomatoes: Four medium tomatoes form the main sauce. Chop them so they soften evenly. Ripe tomatoes usually break down more easily and provide a balanced sweet-tart flavour. If the tomatoes are particularly firm, allow extra time for them to soften before reducing the masala.

    Oil or ghee: Two tablespoons are enough to begin cooking. Ghee gives a richer aroma, while neutral cooking oil keeps the flavour lighter. The amount needed can vary slightly with the pan and the chicken.

    Ginger-garlic paste: One tablespoon builds the savoury base. Cook it briefly with the chicken and spices so its raw aroma fades, but avoid scorching it.

    Ground spices: Use one teaspoon of red chilli powder, one teaspoon of coriander powder, half a teaspoon of cumin and salt to taste. These seasonings support the tomato and ginger flavours. Start with less chilli if you are unsure, because you can adjust the seasoning near the end.

    Fresh finishing ingredients: Three slit green chillies, one tablespoon of ginger cut into thin matchsticks, fresh coriander and lemon complete the dish. Add these near the end so their freshness remains noticeable.

    Equipment and preparation before cooking

    A wide karahi is ideal because it gives the chicken room to brown and allows moisture to evaporate. If you do not have a karahi, choose a wide, heavy-bottomed frying pan or sauté pan. A very small saucepan can crowd the chicken and trap steam, making it harder to reduce the masala.

    Before turning on the stove, wash and prepare the tomatoes, slit the green chillies, cut the ginger into matchsticks and measure the spices. Keep the chicken refrigerated until you are ready to cook. Use a separate board and utensils for raw chicken, and wash your hands and work surfaces after handling it.

    Patting the chicken reasonably dry with clean kitchen paper can help it brown instead of releasing excess surface water immediately. Do not rinse raw chicken in the sink, as splashing can spread germs around the kitchen.

    Step-by-step method

    1. Heat the oil or ghee in the karahi over medium-high heat. Add the chicken in a single layer if possible. Let the pieces take on a little colour, turning them as needed. If your pan is small, brown the chicken in batches rather than crowding it.

    2. Add the ginger-garlic paste. Stir for a short time until fragrant. Add the red chilli powder, coriander powder, cumin and salt. Mix so the spices coat the chicken. If the pan looks dry, lower the heat briefly and stir carefully so the ground spices do not burn.

    3. Add the chopped tomatoes and mix well. Cover the pan and cook over medium heat, stirring from time to time. The tomatoes will soften and release liquid. The chicken will cook in this moisture while the flavours combine. If the mixture begins sticking before the chicken is tender, add a small splash of water rather than allowing the masala to burn.

    4. Check the largest chicken piece for doneness. The centre should no longer be raw, and poultry should reach a safe internal temperature of 74°C (165°F) measured with a food thermometer at the thickest part without touching bone. If it needs more time, cover and continue cooking gently.

    5. Once the chicken is cooked, remove the lid. Continue stirring and cooking until excess tomato liquid evaporates and the masala becomes thick. You may see a little oil around the edges. This is a sign that the sauce has reduced; it is not necessary to cook until the pan becomes excessively oily.

    6. Add the slit green chillies and ginger matchsticks. Cook for another minute or two so they warm through while keeping some freshness and texture. Taste the masala and adjust salt or lemon to your preference.

    7. Turn off the heat. Sprinkle over chopped fresh coriander and a squeeze of lemon. Let the karahi rest for a few minutes, then serve while hot.

    How to get a thick, flavourful karahi

    The most important part of the texture is reducing the tomato masala after the chicken has cooked. If you serve it while the tomatoes are still watery, the flavour may taste diluted. Keep the pan uncovered for the final stage and stir regularly so the sauce thickens without catching at the bottom.

    Use ripe tomatoes and avoid adding too much water at the beginning. The chicken and tomatoes release moisture as they cook. Add extra liquid only when needed to prevent sticking or to help the chicken finish cooking.

    Fresh ginger is not just decoration. Its sharp, clean flavour balances the richness of the masala. Add most of the ginger near the end rather than cooking all of it for a long time.

    Common mistakes and how to avoid them

    Cooking the chicken over very high heat throughout can brown the outside before the centre is cooked. Brown it initially, then let it cook through at a steady medium heat. The largest pieces should always be checked before serving.

    Adding all the water at once can leave the finished dish thin. Begin with the tomatoes and allow them to release their own liquid. Add only small splashes if the pan becomes too dry.

    Burning the spices gives the masala a bitter taste. Stir the ground spices briefly and add tomatoes soon after. Lower the heat if the pan is extremely hot.

    Cutting the ginger and green chillies too early and leaving them exposed for a long time can reduce their fresh aroma. Prepare them shortly before the finishing stage when possible.

    Using too much chilli at the beginning can make it difficult to balance the dish. Start with a moderate amount, taste after the masala reduces, and then adjust carefully.

    Variations and substitutions

    For a boneless version, use boneless chicken cut into even pieces and reduce the cooking time. Check the centre of the largest piece so it is fully cooked but not overdone. Boneless chicken breast is lean and can dry out more quickly than thigh meat.

    For a milder family version, reduce the red chilli powder and use one green chilli or omit it. You can still keep the ginger, coriander and tomato flavours prominent.

    If you prefer a richer finish, use ghee instead of oil or add a small extra spoon near the end. Keep the quantity modest so the tomato masala remains the main feature.

    If fresh tomatoes are not very ripe, cook them a little longer until they break down. Avoid relying on large amounts of tomato paste as a direct replacement, because it changes the flavour and thickness.

    What to serve with chicken karahi

    Warm naan or roti is a classic choice because it can scoop up the thick masala. Plain chapati works well for an everyday meal. Steamed basmati rice is another option, especially if you prefer a less bread-focused plate.

    Fresh cucumber, onion and tomato salad adds crunch and freshness. Plain yogurt or cucumber raita can soften the heat. Lemon wedges, mint chutney and sliced green chillies can be offered separately so everyone can adjust their own plate.

    For a fuller family spread, serve the karahi with a simple salad, one bread or rice option and a cooling side. You do not need many elaborate dishes because the karahi itself is strongly flavoured.

    Storage, reheating and food safety

    Refrigerate leftovers promptly in a shallow, covered container. Do not leave cooked chicken at room temperature for more than two hours, or one hour in very hot conditions above 32°C (90°F). Use refrigerated leftovers within three to four days.

    Reheat only the portion you plan to eat, until it is steaming hot throughout. A small splash of water can loosen the masala if it has thickened in the refrigerator. Stir during reheating so the centre warms evenly. Avoid repeatedly cooling and reheating the same batch.

    Freeze portions in suitable airtight containers if you need to keep them longer. Thaw safely in the refrigerator and reheat thoroughly. The texture of the tomato masala may change slightly after freezing, but stirring while reheating can help bring it together.

    Frequently asked questions

    Can I make chicken karahi without a karahi pan? Yes. A wide, heavy-bottomed frying pan or sauté pan works well. Choose a pan that gives the chicken enough space and lets moisture evaporate.

    Can I use boneless chicken? Yes. Cut it into even pieces and shorten the cooking time. Check that the centre reaches 74°C (165°F) and avoid overcooking.

    Why is my chicken karahi watery? It may need more uncovered cooking time. Let excess tomato liquid evaporate while stirring regularly. Avoid adding too much water at the start.

    How can I make the dish less spicy? Reduce the red chilli powder and green chillies. Taste the masala near the end before adding more heat.

    Can I prepare it ahead? You can cook it ahead and refrigerate it safely. Reheat gently until piping hot. Add a little fresh coriander and ginger just before serving to refresh the flavour.

    Can I add yogurt? This version does not require yogurt. Adding it will change the flavour and texture; if you experiment, use a small amount and stir it in carefully over lower heat so it does not split.

    How do I know the chicken is cooked? Check the thickest part of the largest piece with a food thermometer. It should reach 74°C (165°F). Do not rely on colour alone.for more infoChicken Karahi Recipe – Pakistani Tomato Chicken Karahi

    Final thoughts

    Chicken karahi is a useful recipe to keep in your home-cooking collection because it uses familiar ingredients and can be adjusted to suit different tastes. Take your time reducing the tomato masala, check the chicken carefully and finish with fresh ginger, green chillies and coriander. Serve it hot with naan, roti or rice and a cooling side. Once you are comfortable with the method, you can adjust the chilli level and garnish while keeping the same simple cooking approach.